Using Everyday Elements

Hi and welcome!
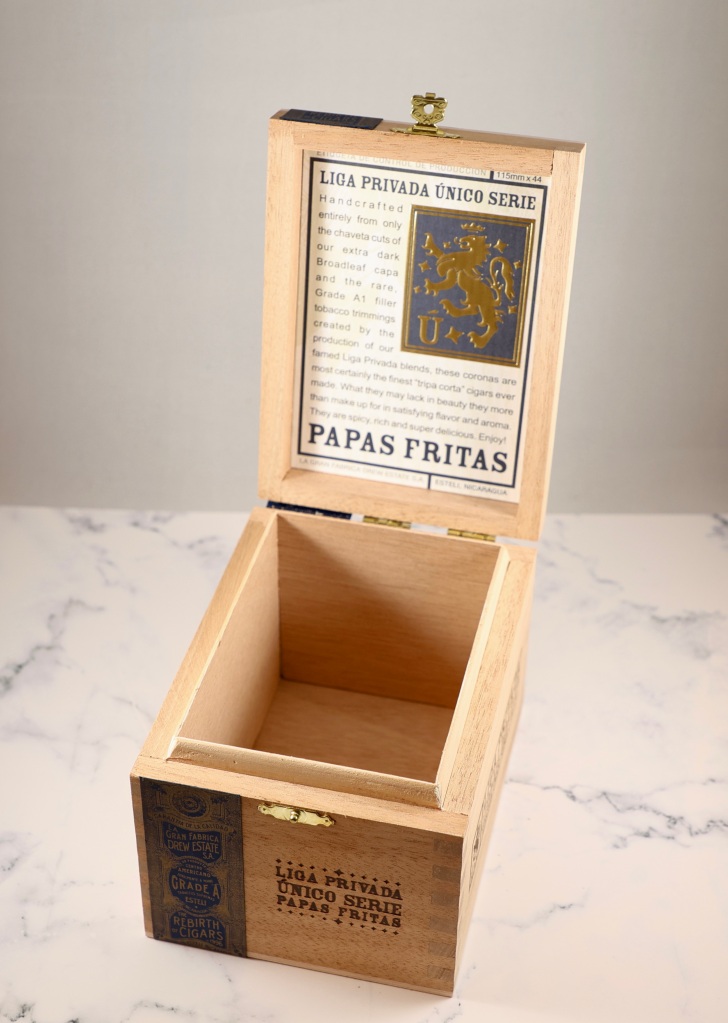
Elizabeth Craft Designs fun new ATC Special Kit has inspired me to create many artist trading cards (ATC) that I now need to store. Fortunately, I have an empty cigar box that’s the perfect size (3.75″ length x 3.5″ wide x 5″ depth). There is space for about 35 trading cards – I’ve made 29 ATCs in the last month!
I want the box to be decorated, but still have a hint of its original purpose, so, I left the blue and gold paper strip that came on the box intact. However, I removed the paper from inside the lid and saved the gold lion stamp. You’ll see that again.
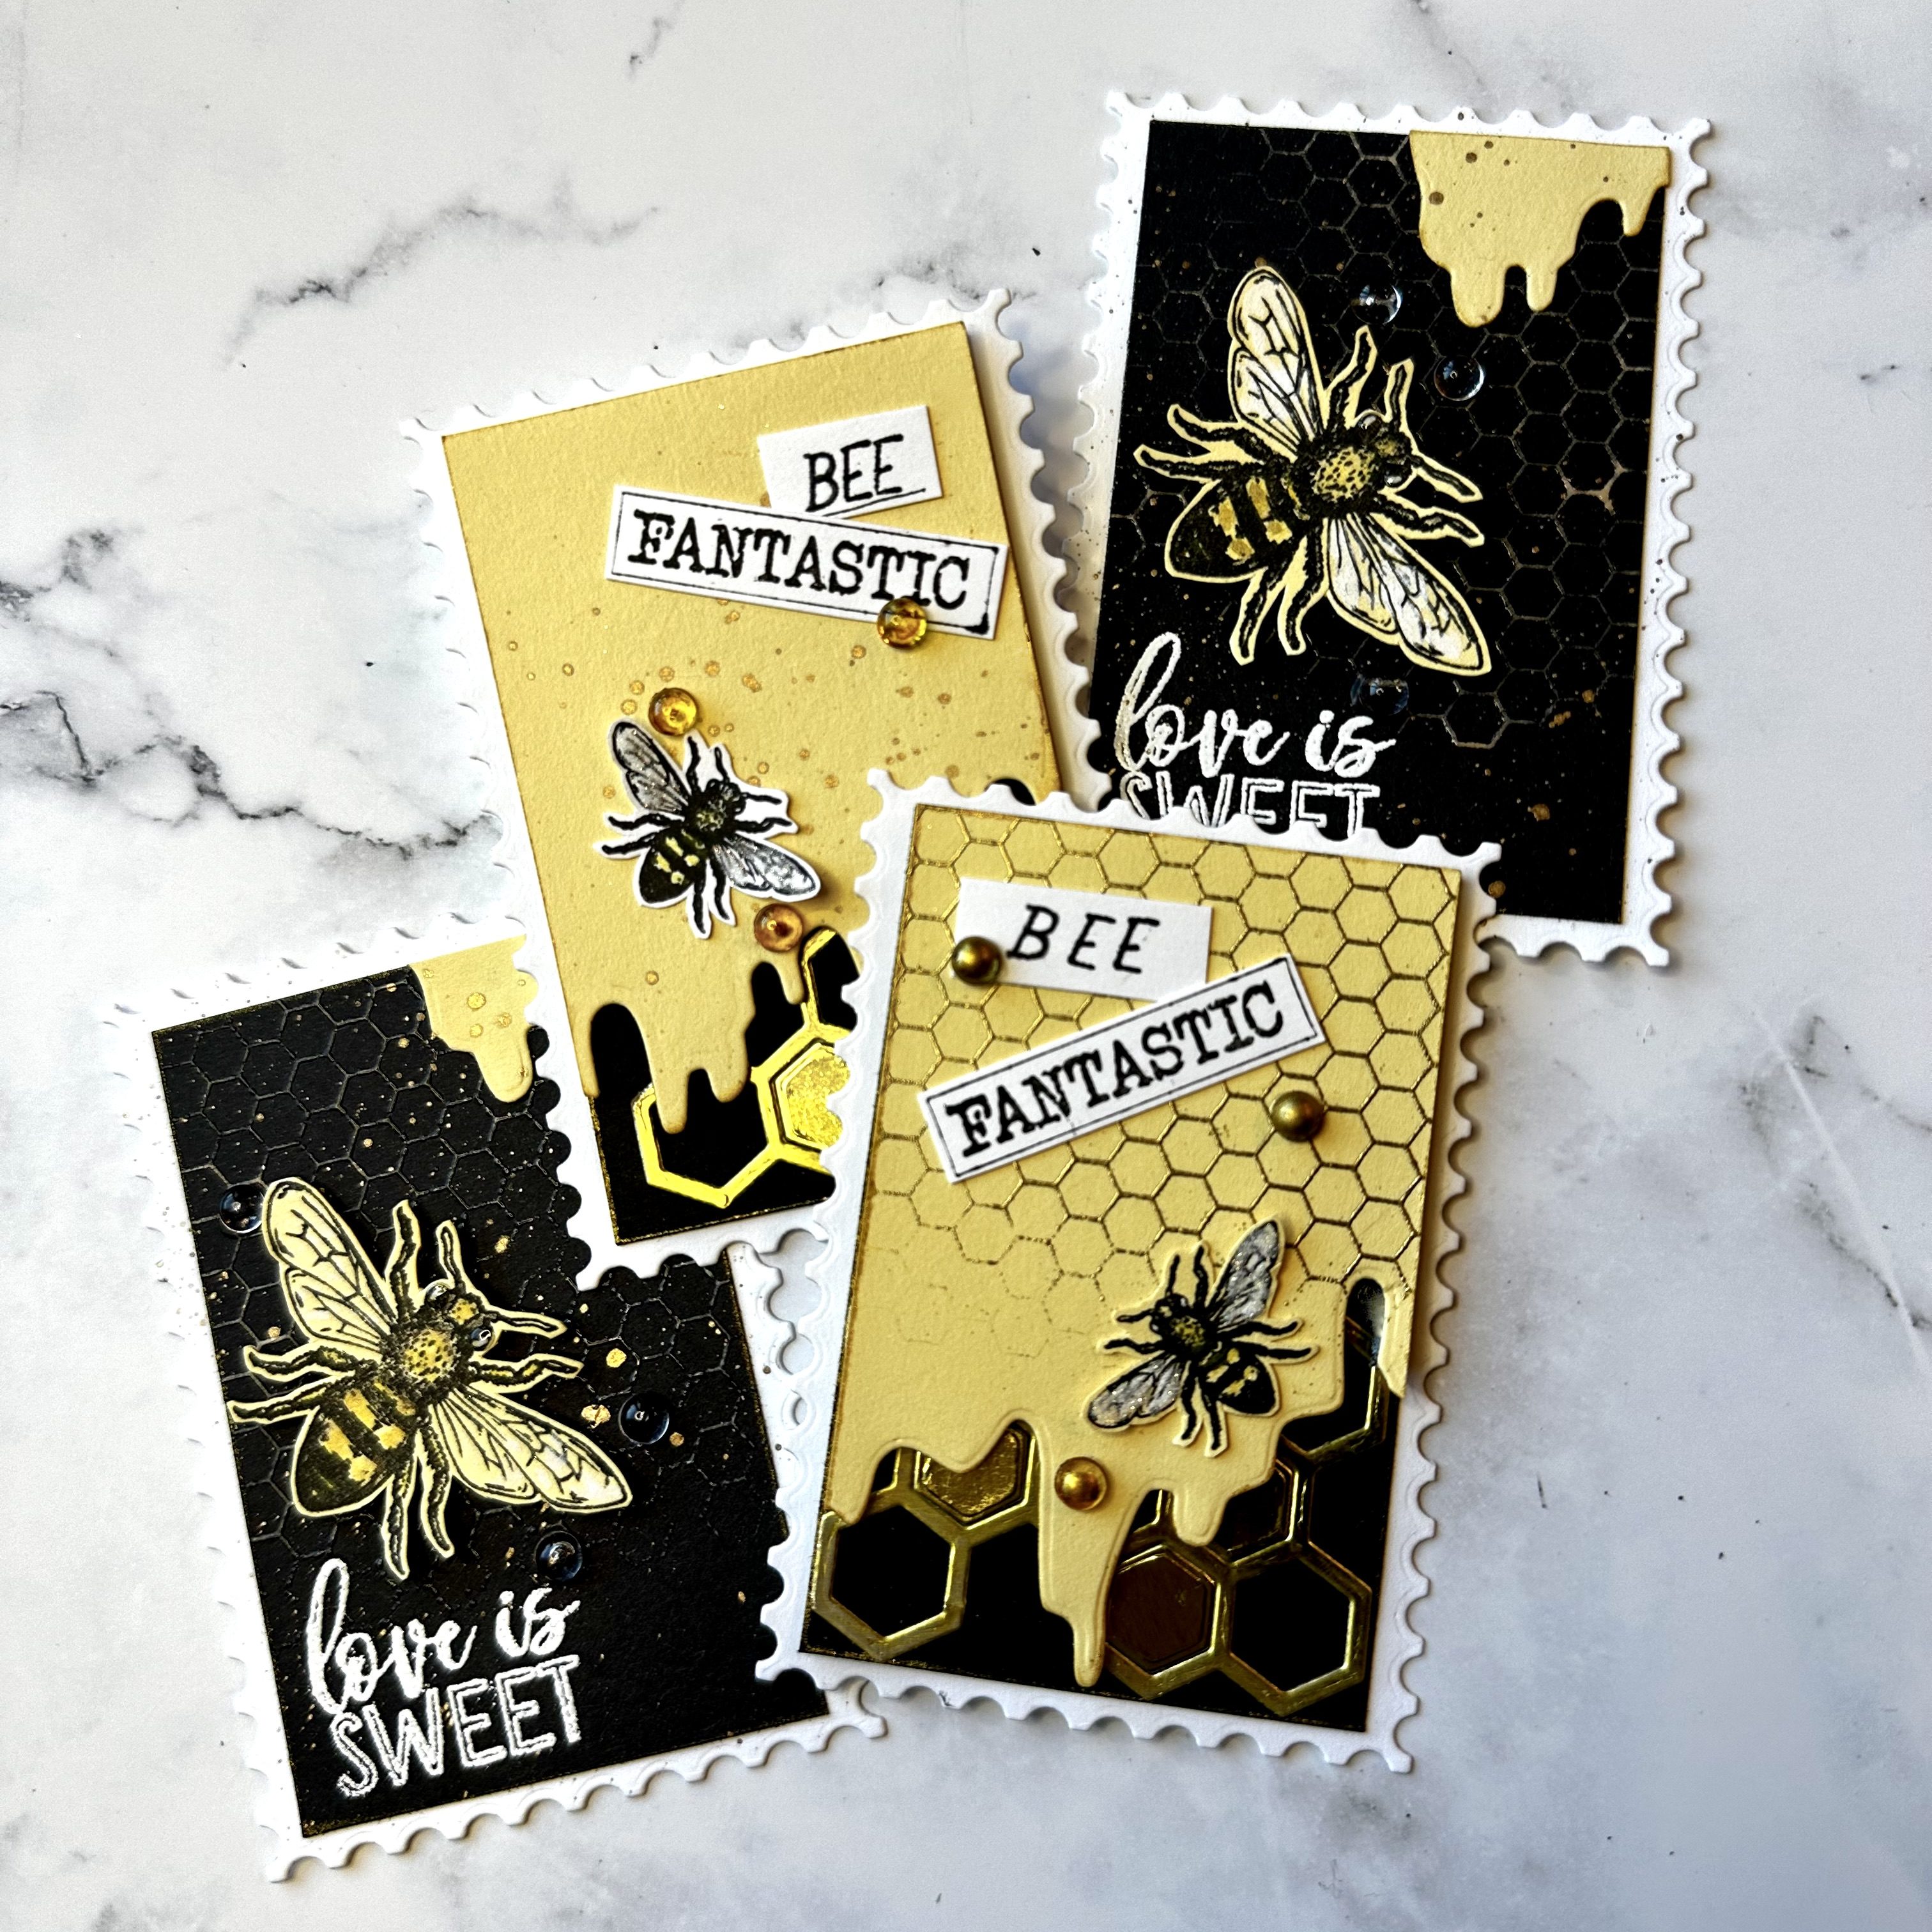
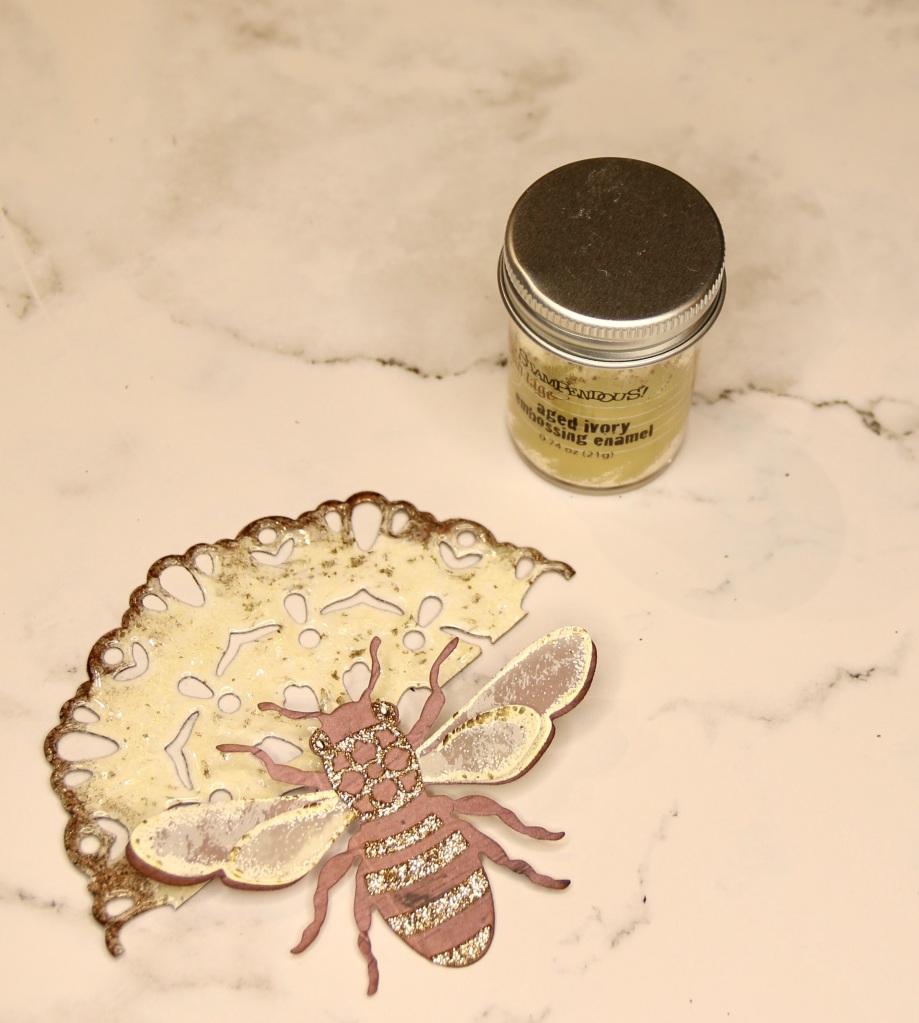
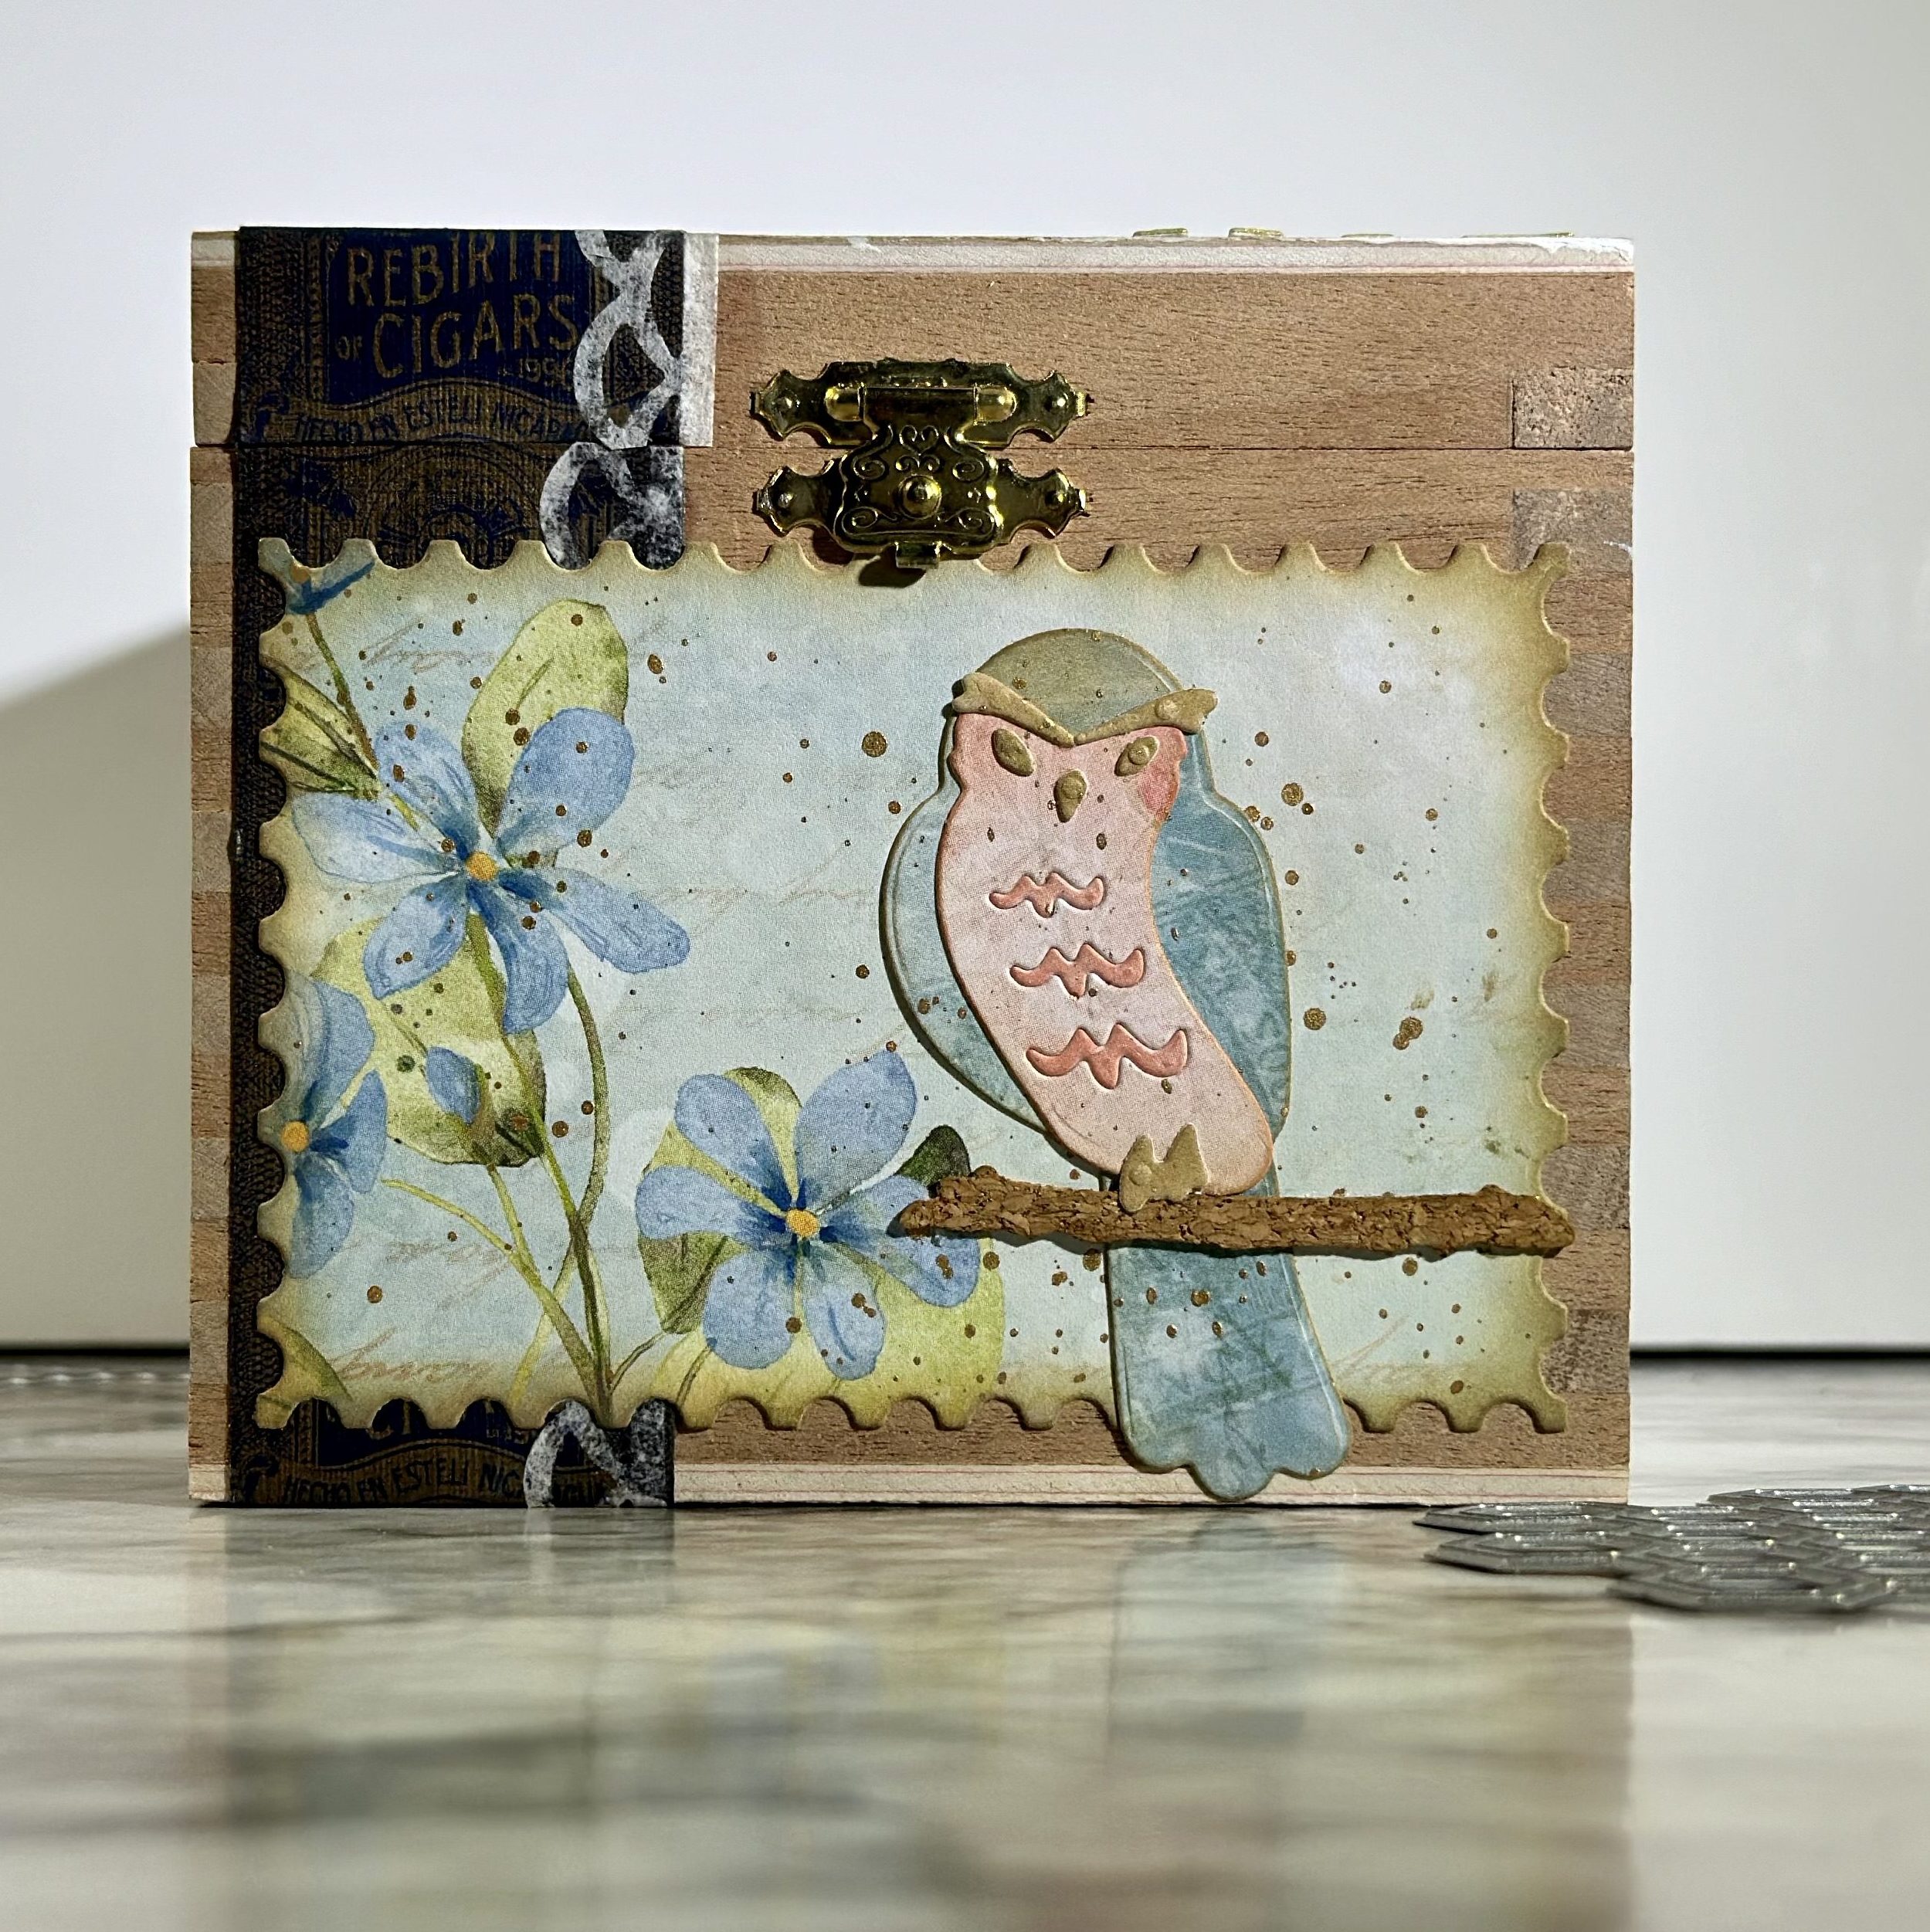
To decorate the box, I only used the new Garden Party paper pack, Soft Finish and black cardstock, and Annette Green’s Everyday Elements line of dies. I was inspired by Reana van Haren’s recent video to make a layered mixed media feature on the lid. I stacked and glued two layers of thin cardboard honeycomb die-cuts, adhered the honeycomb to the lid, then applied gesso. Next, texture paste was randomly applied through the honeycomb stencil. When dry, I sanded some areas to soften the look, then applied brown distress stain and wiped it off. Some gold splatter and the “ATC” letters were added and it was topped with the beautiful, detailed, large honeybee. A dusting of Silk Microfine Glitter over the top represents pollen. Unfortunately, it doesn’t show up in the photo.
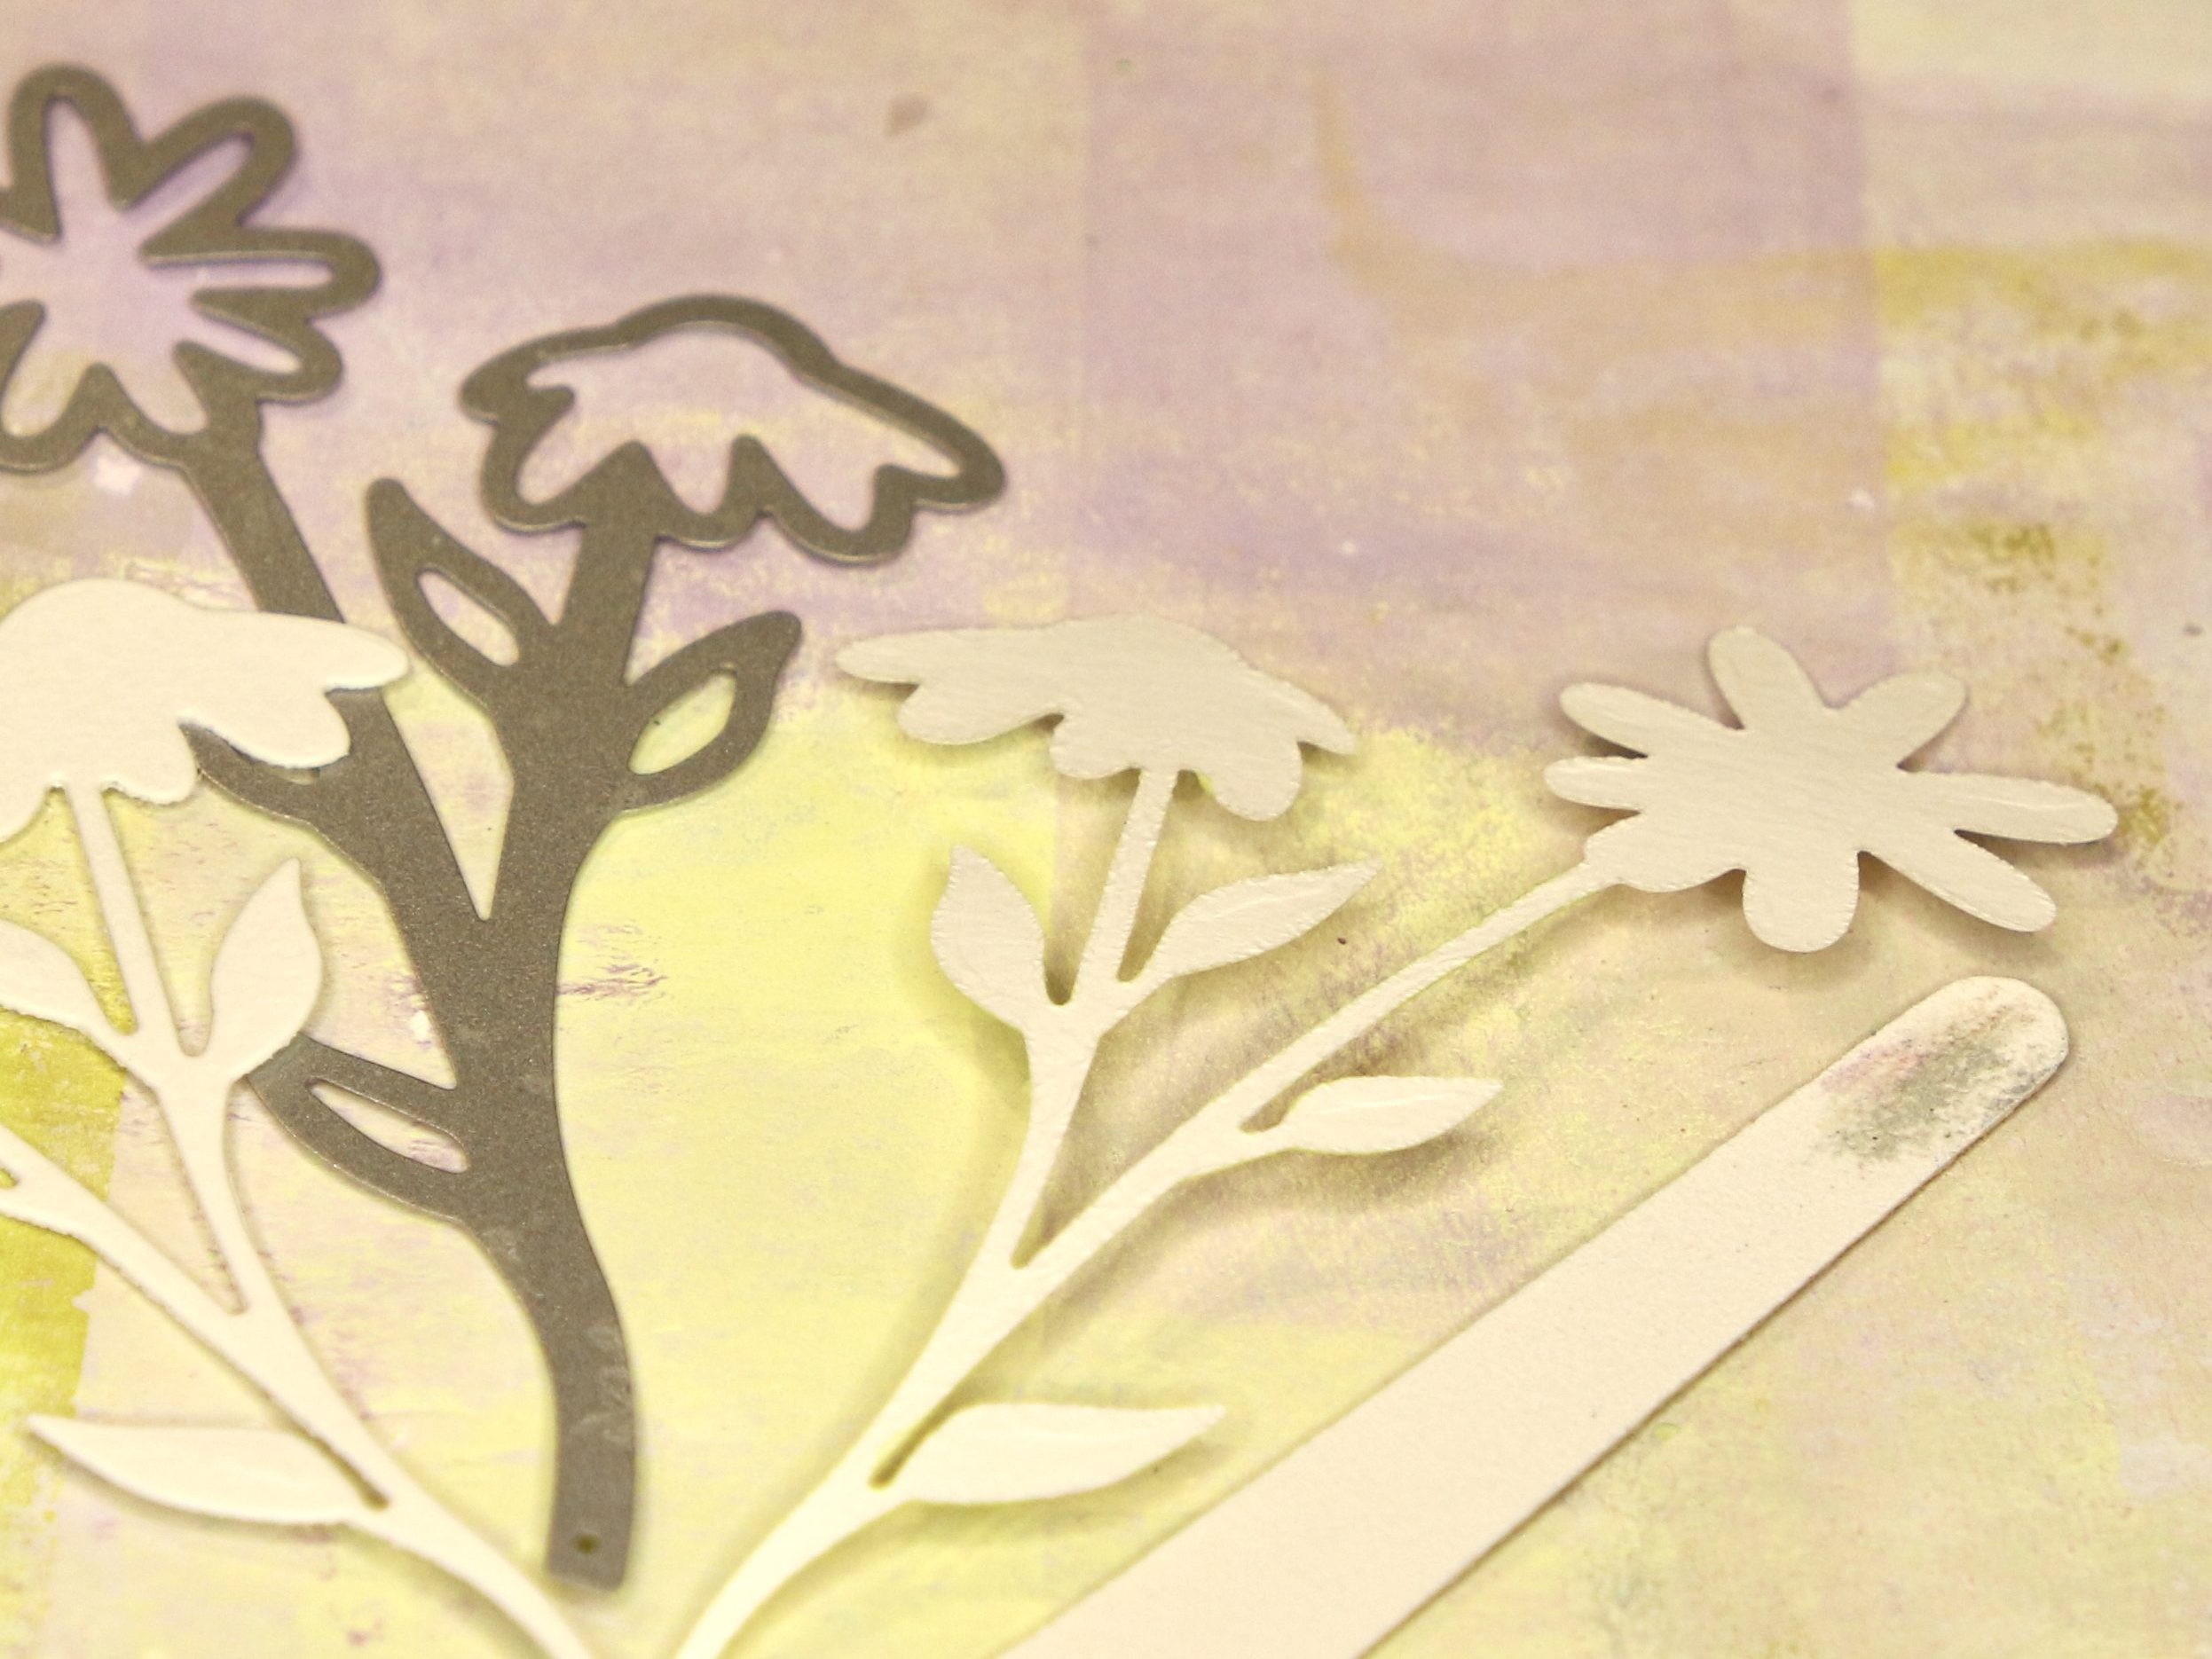
I used the partial die cutting technique (described in my previous post) to adapt the postage stamp dies to fit the sides of the cigar box. The largest and second largest postage stamp dies were the best fit. I selected and cut areas of the Garden Party paper that had blue flowers. Since I wanted the paper to coordinate with the original blue cigar box paper, I used a blue Copic Marker to add touches of deeper blue around the center of the flowers.
I avoided the flowers in the paper when I cut the owl, flourish, flower stems, and large layered honeybee. I was concerned that flowers on both layers would not be enough contrast. Brown Distess Oxide was added to the die-cut edges and I splattered gold watercolor over most elements. Each little scene was assembled and adhered to my box. I’m really please with the final result!
Do you make ATCs?
Thanks so much for reading along. Do you have any questions?
Happy crafting,
Di / a little bird crafts


Use the links provided to receive 10% off of your order and I will receive a small commission with no additional cost to you – thank you.
- Elizabeth Craft Designs Supplies
- Postage Stamps #2026 https://collabs.shop/lljrak
- Layered Honeybees #2024 https://collabs.shop/95ccuq
- Stemmed Flowers #2027 https://collabs.shop/tjvnph
- Fall Wreath & Owl #2079 https://collabs.shop/tjvnph
- Fancy Flourishes #2021 https://collabs.shop/tjvnph
- Lace Border #2022 https://collabs.shop/gsn3wc
- Large Doilies #2019 https://collabs.shop/e9iovk
- Garden Party Paper https://collabs.shop/qt2hiu
- Planner Stencils 2 #S045 https://collabs.shop/zooclc
- Soft Finish Cardstock https://collabs.shop/95ccuq
- Fine Pointed Tweezers #817 https://collabs.shop/sn45ce
- Silk Microfine Glitter Warm Diamond https://collabs.shop/sn45ce
- Other supplies
- Distress Oxide in coordinating colors
- Cork
- Delicata Gold Ink Pad
- Blue Copic marker
- Gold Kuretake watercolor
- Art Glitter Glue