And Altering Stamps
Hi. Welcome to a little bird crafts. How is your summer so far?
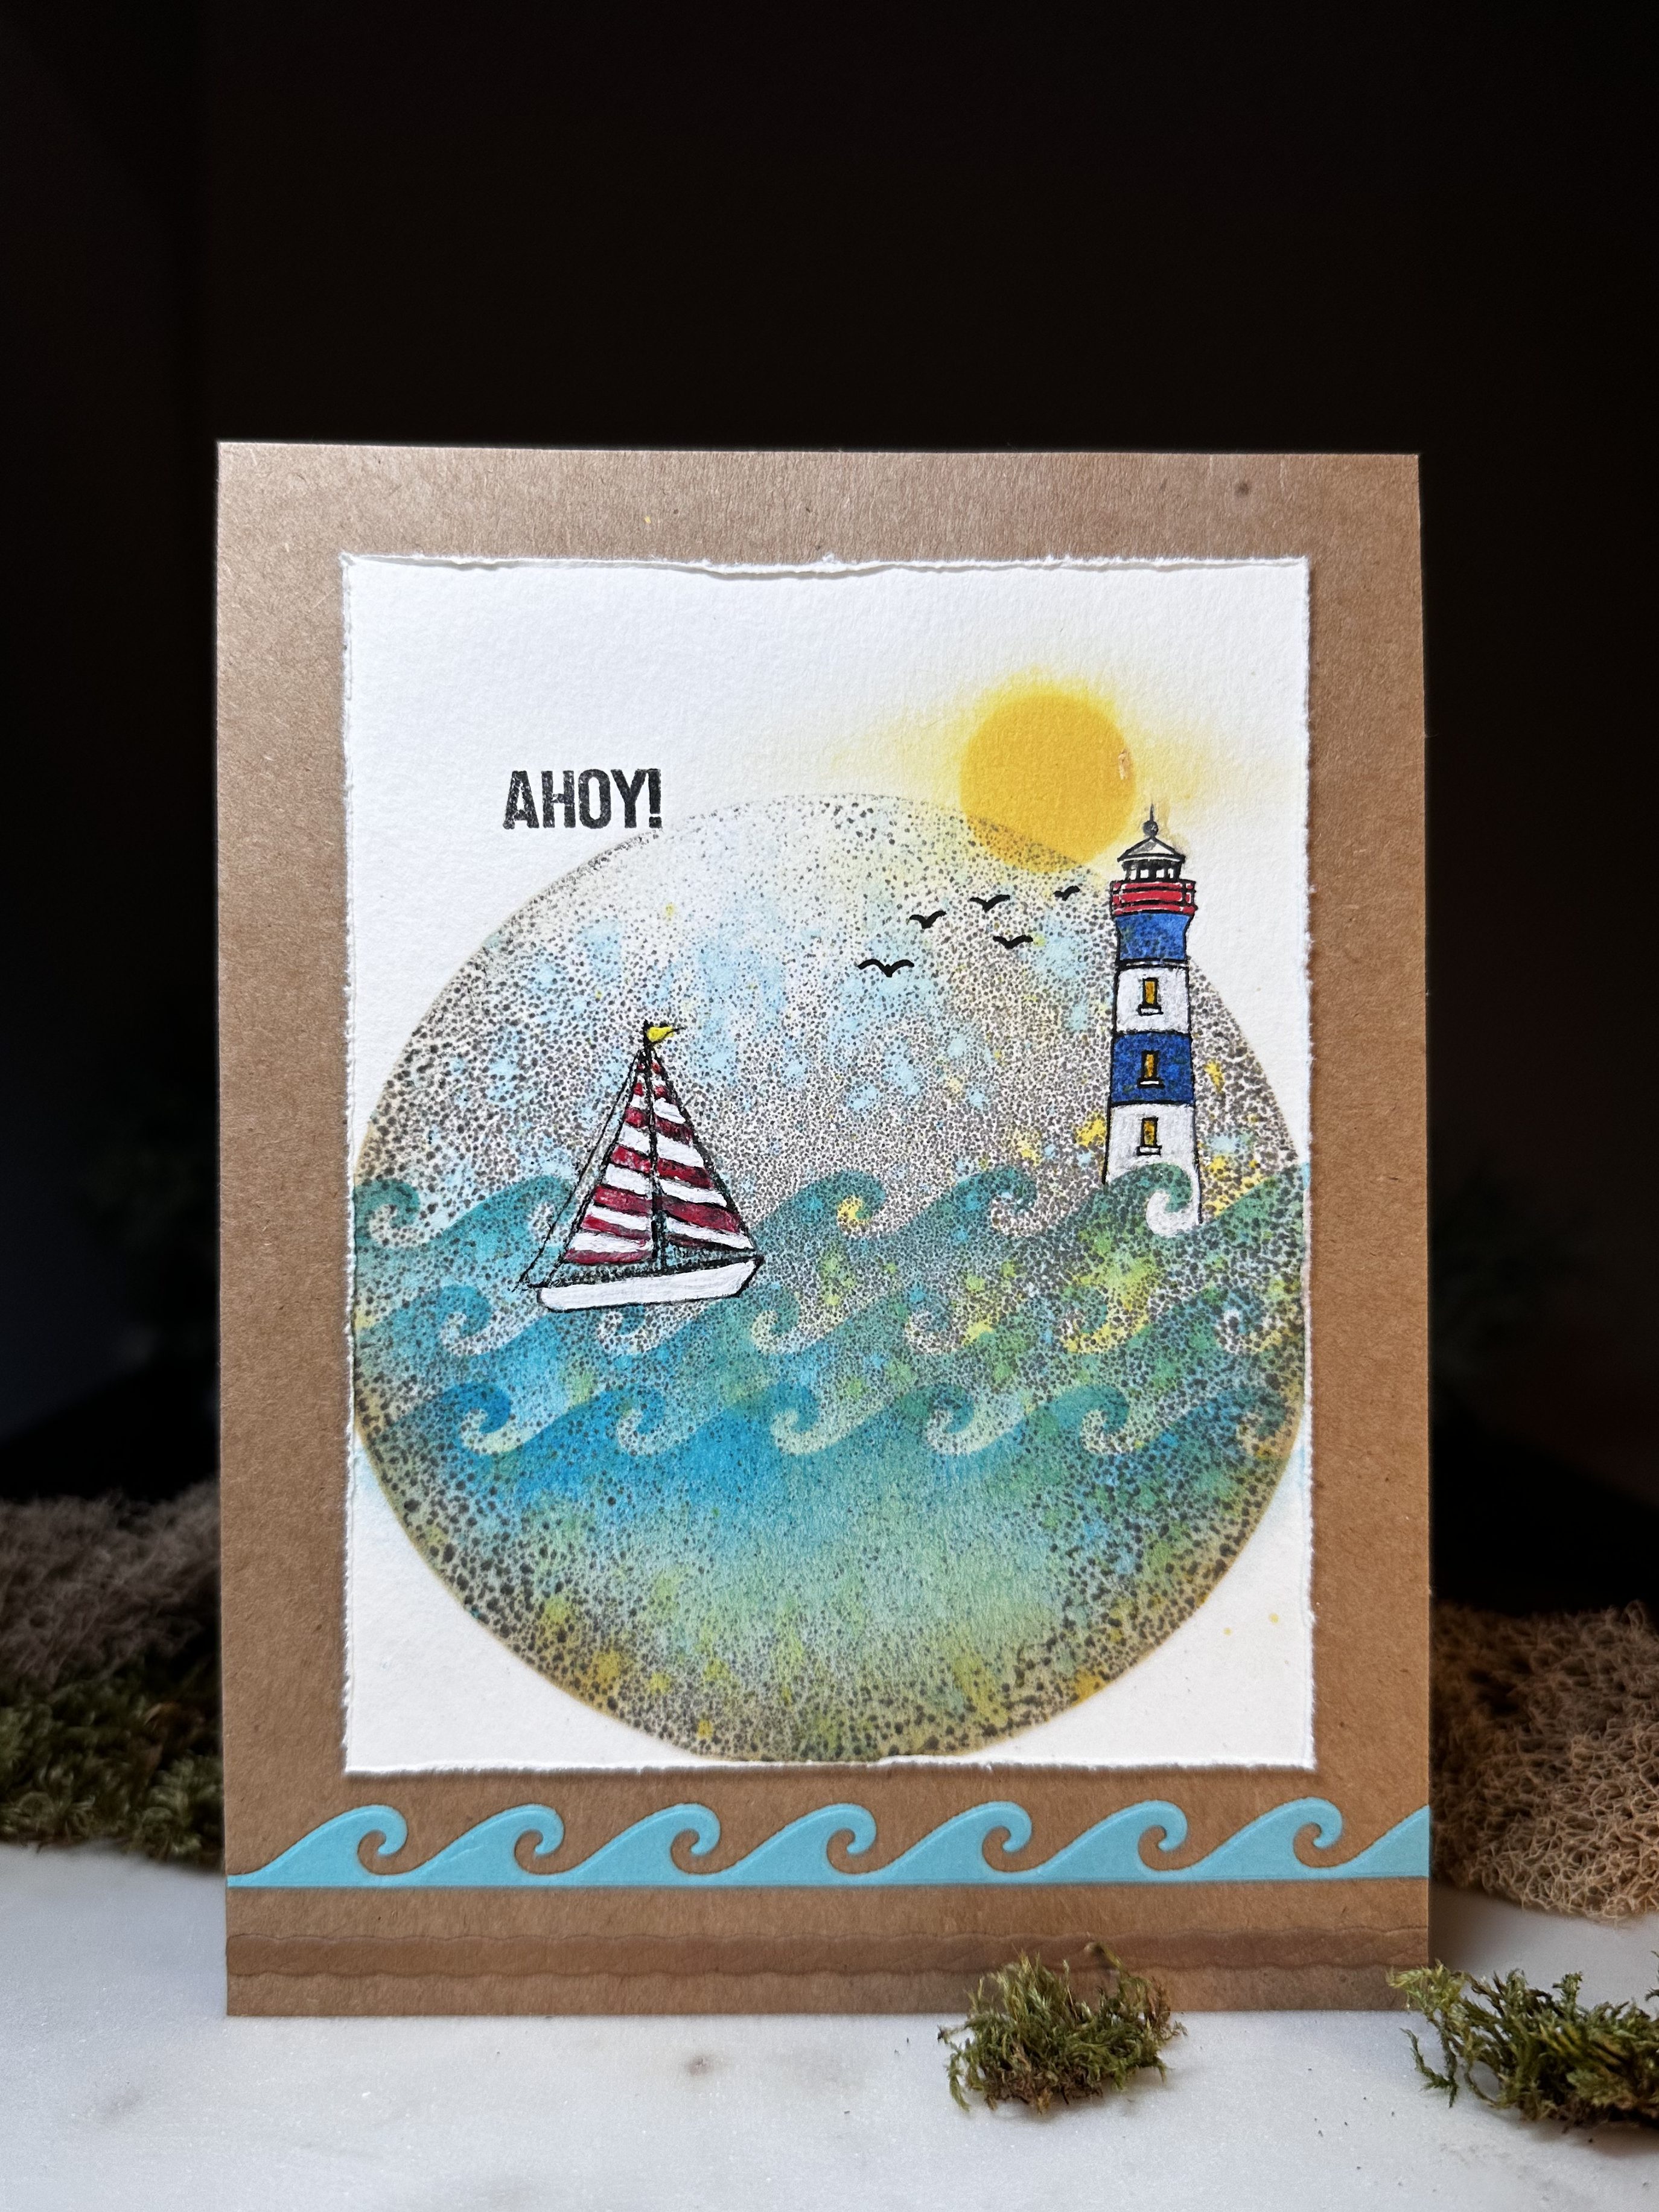
I love playing with the gel plate, but it doesn’t happen often, and I’m certainly a novice. Even so, this 5×7 inch card was a lot of fun to create using the gel plate and some less common techniques.
To begin, use a brayer to apply a thin coat of gray ink to a 4 inch gel plate. Splatter watered down blue, yellow, and green watercolors over the gray, then pressed a piece of watercolor paper over the gel plate. It’s always fun to see what the result is!
Cut a piece of 2″ x 5″ cardstock with the wave border die to make a wave “mask”. Use the longer “negative” paper to cover the area that isn’t getting inked. Starting toward the bottom of your round print, hold the wave mask in place and lightly apply blue ink with a blending brush to create a wave. Stay within the circle background. Move the mask about 1/2″ up and add another line of waves with the blending brush. Repeat for a third line of waves.
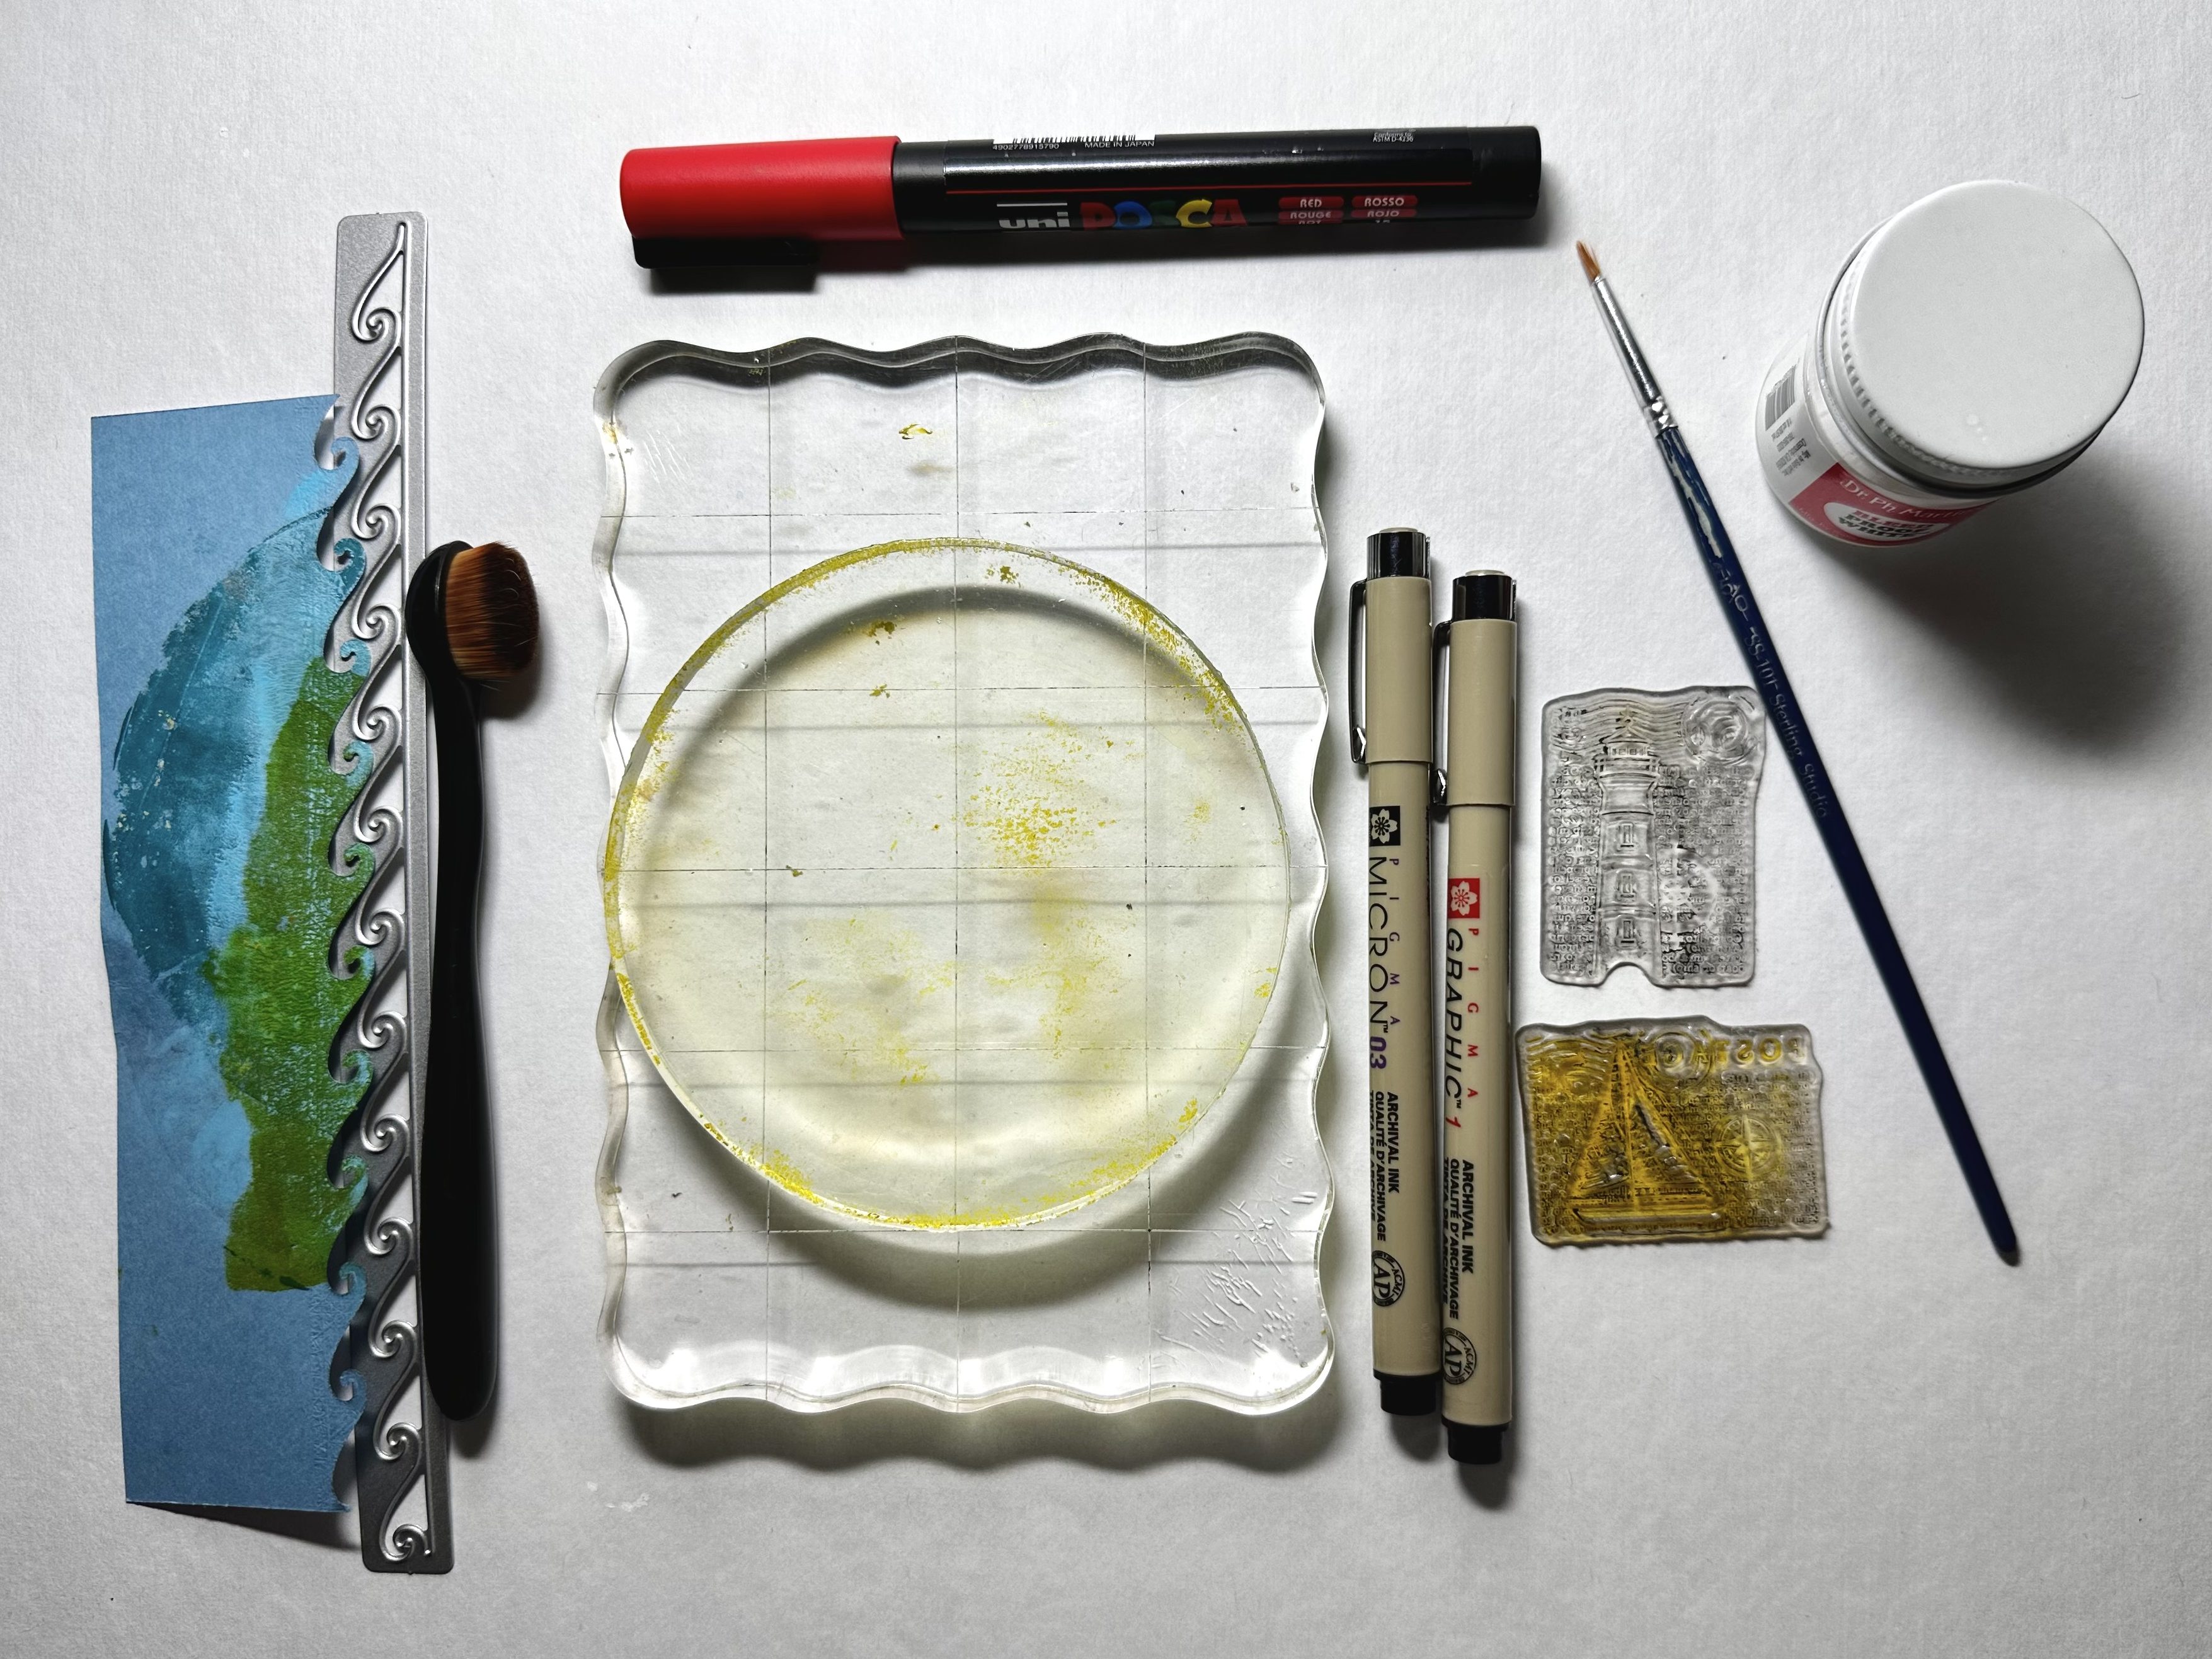
5/0 paintbrush, Dr. Ph., Posca pen above.
Use a stamp platform and position the sailboat and lighthouse stamps, from the Travel & Postage stamp set, where you want them. Working in small sections, use the #1 Pigma marker to quickly apply ink only over the outline of the sailboat and lighthouse. Try not to get ink on the words. Repeat until the whole outline is visible.
Use the Dr. Ph Martin paint to cover the areas of stamped images that you want to be white. Use colored markers where you want to add color to the sail and lighthouse.
If needed, use the 03 Pigma marker to touch-up areas of the stamped images.
Draw birds with the 03 Pigma marker.
Use a 1 inch punch or die to create a stencil and mask from paper. Create a sun by blending yellow Distress Oxide ink through the stencil. Lightly add a bit of yellow Oxide ink outside of the sun.
Mask around the outside of the circle background. Lightly blend Frayed Burlap along the outer edge of the circle especially along the bottom where sand would be.
Add to a card base and embellish.
Thanks so much for stopping by. I’d love it if you’d leave a comment.
Happy creating!
Di/a little bird crafts
You can receive a 10% discount by using the affiliate links provided and I will receive a small commission at no additional cost to you.
Supplies:
- 4″ Gel Press printing plate
- Elizabeth Craft Designs Borders & Trims dies 2139 https://collabs.shop/ewfgmo
- Elizabeth Craft Designs Travel & Postage stamps CS352 https://collabs.shop/fyue8x
- A stamp platform
- Watercolor paper
- Watercolors: yellow, green, blue
- 1 (1.0 mm) black Pigma Archival Ink pen
- 03 (0.35mm) black Pigma Archival Ink pen
- Dr. Ph. Martin’s Bleed Proof White
- 5/0 or smaller paintbrush
- Various ink pads: medium to light gray, blue or blue-green Distress Ink pad, yellow Distress Oxide, Frayed Burlap Distress Oxide, and black
- Somewhat opaque markers like: Faber-Castell Pitt pen or Uni Posca

Great post!
LikeLike