Hi! How are you? I’m posting from my friend’s beautiful Colorado home set at an altitude of 7,000 feet. The view out the front is of pine-tree covered mountains. Looking to the back are mountains with a high vertical wall of red stone set in a national forest. Right now, everything is blanketed in a layer of snow. It’s gorgeous!
Now, on to the card. I enjoy participating in card challenges and the prompts help to inspire me with new card ideas. And, who doesn’t want a chance to win a gift certificate to your favorite stamp company? So, in my haste to submit a card before the deadline and trying to get to bed at a reasonable time, I submitted this card.
Lawn Fawn’s I Like Naps stamp set
The image is a darling sloth from Lawn Fawn filled in with colored pencils from Luminance by Caran D’Ache. But, in my rush to submit the card and go to bed, one heart is not colored and leaves are left oddly floating by the tree branch.
The same card after a few adjustments
The next morning I caught the mistakes and made a few adjustments. I stamped, colored, and die cut a couple of leaves so the floating leaves are “connected” to the tree. The heart is now colored and a tiny amount of dimension was added to all the hearts with a liquid enamel and a few highlights were added with a white gel pen. Little changes, but the card looks complete.
Done may be better than perfect, but, a second look at a project can make a big difference.
Hello! I hope you’re staying warm. It’s c-c-c-cold and windy here in Oklahoma today. No snow, but my card definitely reflects the feeling outside right now. This card is for the ECD Planners & Journaling January 2022 prompt, monochromatic.
I started with a white A2 card base and attached a blue watercolor background that I’d previously made using the dip and dry technique. Two hills were cut from white glitter paper using the SlimlineAdventure Edges dies. I taped down the first hill and popped the second up with foam tape.
Snowflakes from the Elizabeth Craft Designs Mason Jar set, were used to cut white glitter paper and both size trees from the Mason Jar set were cut from corrugated white glitter paper. Both small trees were adhered to the back hill. Foam tape was placed behind the part of the larger tree that was above the popped-up hill so that it would lay flat and the trunk of the tree was attached with glue.
A bird from the ECD Sidekick Essentials 17 was cut from white #100 card stock and colored with Copic Marker B00. Glue was applied to the bird’s belly and sprinkled with ECD Warm Diamond Microfine Glitter. A line of glue and glitter were applied at the base of the large tree to help ground the tree. The snowflakes were randomly attached with glue and all done!
Thanks for dropping by!
Di
Elizabeth Craft Designs Mason Jar die set
Elizabeth Craft Designs Slimline Adventure Edges dies
Elizabeth Craft Designs Sidekick Essentials 17, Window Folder Set
Glitter paper
Foam Tape
Elizabeth Craft Designs Warm Diamond Silk Microfine Glitter
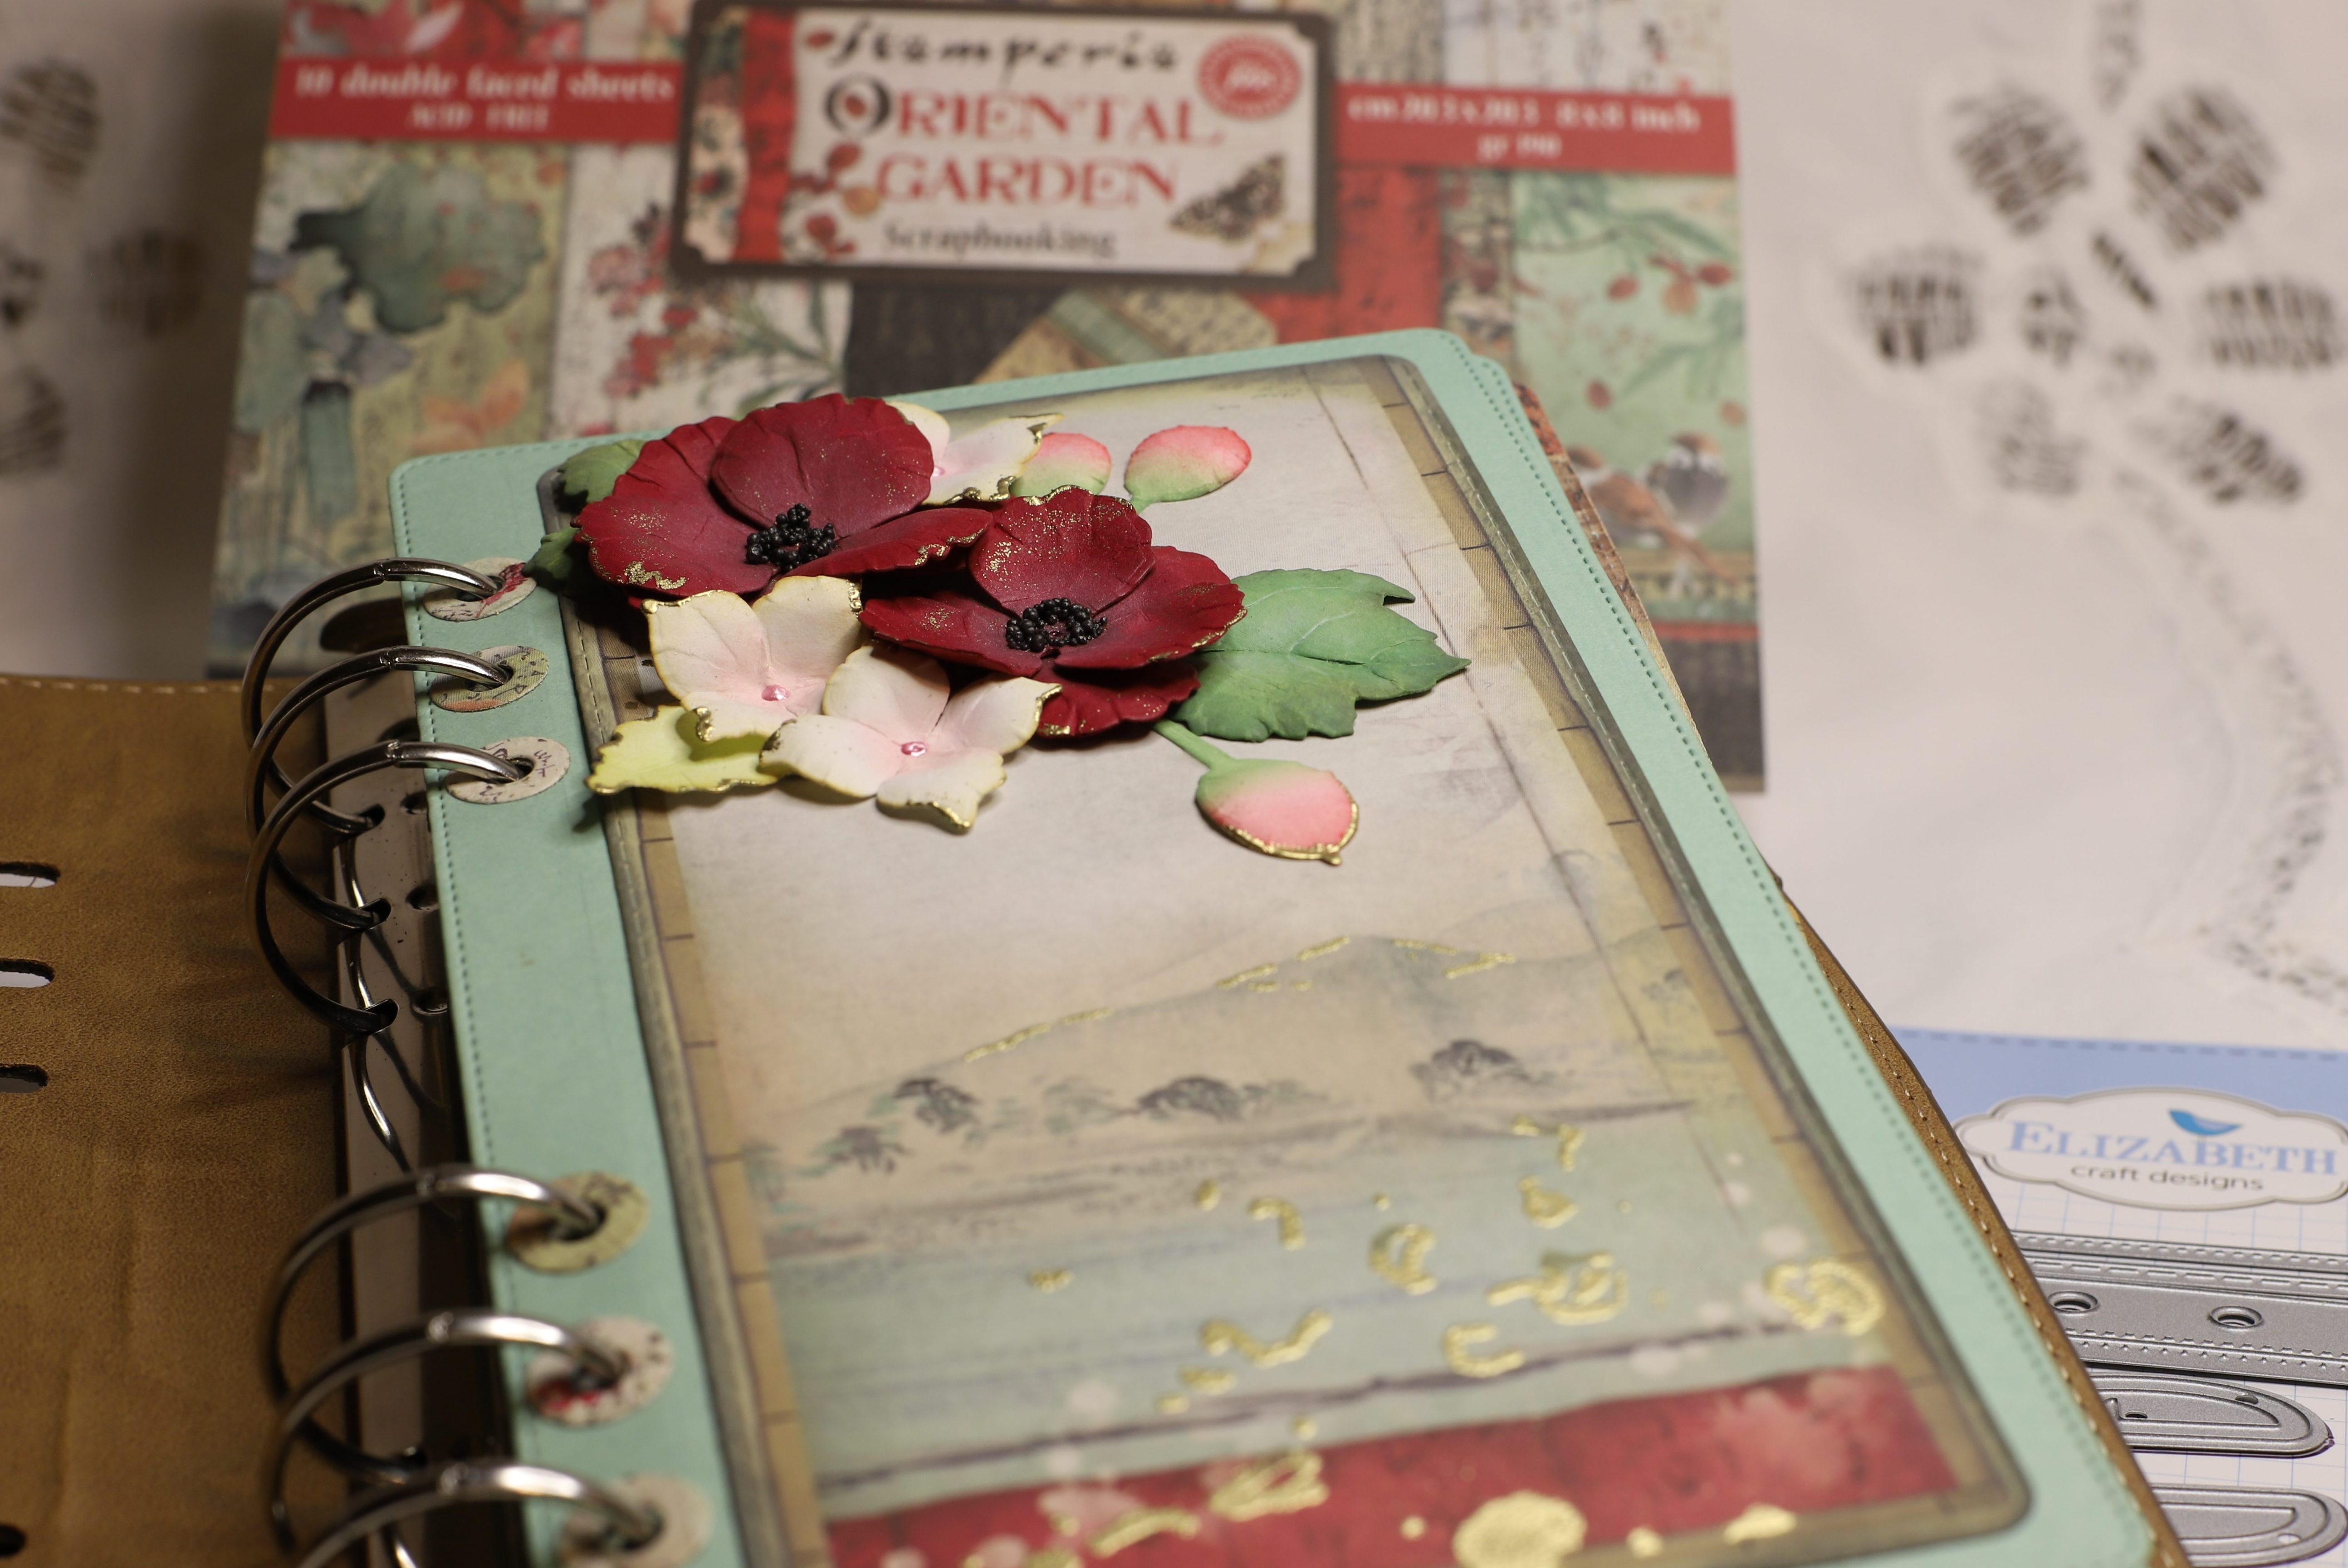
Hi and welcome! Di here. Stamperia’s Oriental Garden paper is so gorgeous that I “had” to have it. I don’t have a specific purpose for this journal, so I left space for photos or journaling, it could even become a planner. This may be gifted to someone – if I can part with it.
Starting with the 12×12 Oriental Garden paper pad and the coordinating package of die cuts, I selected matching solid papers from my stash. I chose a mint green, desert storm, and black. All are about 80 LB weight.
I love the size of the Planner Essentials (journal) dies by Elizabeth Craft Designs, so I used the Planner Essentials 41 Rounded Corner setto cut most of my pages. I cut some from the patterned Oriental Garden paper and some from the solids I’d collected.
Wanting to add a common texture and color through the journal, I used the Elizabeth Craft Designs Planner Essentials 38 Splatter Page to cut a stencil from 110 LB paper. The stencil was laid over the cut pages and I used an embossing pen to ink through the holes in the template. I moved the stencil away, added gold embossing powder to the wet ink, and heat embossed. While the gold doesn’t show up very much on some pages, it does add a unifying color and texture to the journal. Of course, gold accents are perfect for the Asian theme. I didn’t use antistatic powder since random gold powder on the page fits with the aged style of the paper.
Die cut, shaped, and gold embossed flowers
The Elizabeth Craft Designs Florals 2 set was used to cut flowers and leaves from white Soft Finish card stock. I added a touch of Spun Sugar Distress Oxide to the centers and shaped the flowers. The red flowers were die cut using the Florals 4 set from solid red paper and green leaves from the mint paper. These were also shaped and black prills were glued into the flower centers. The embossing marker was used randomly around the flower edges and embossed with gold powder.
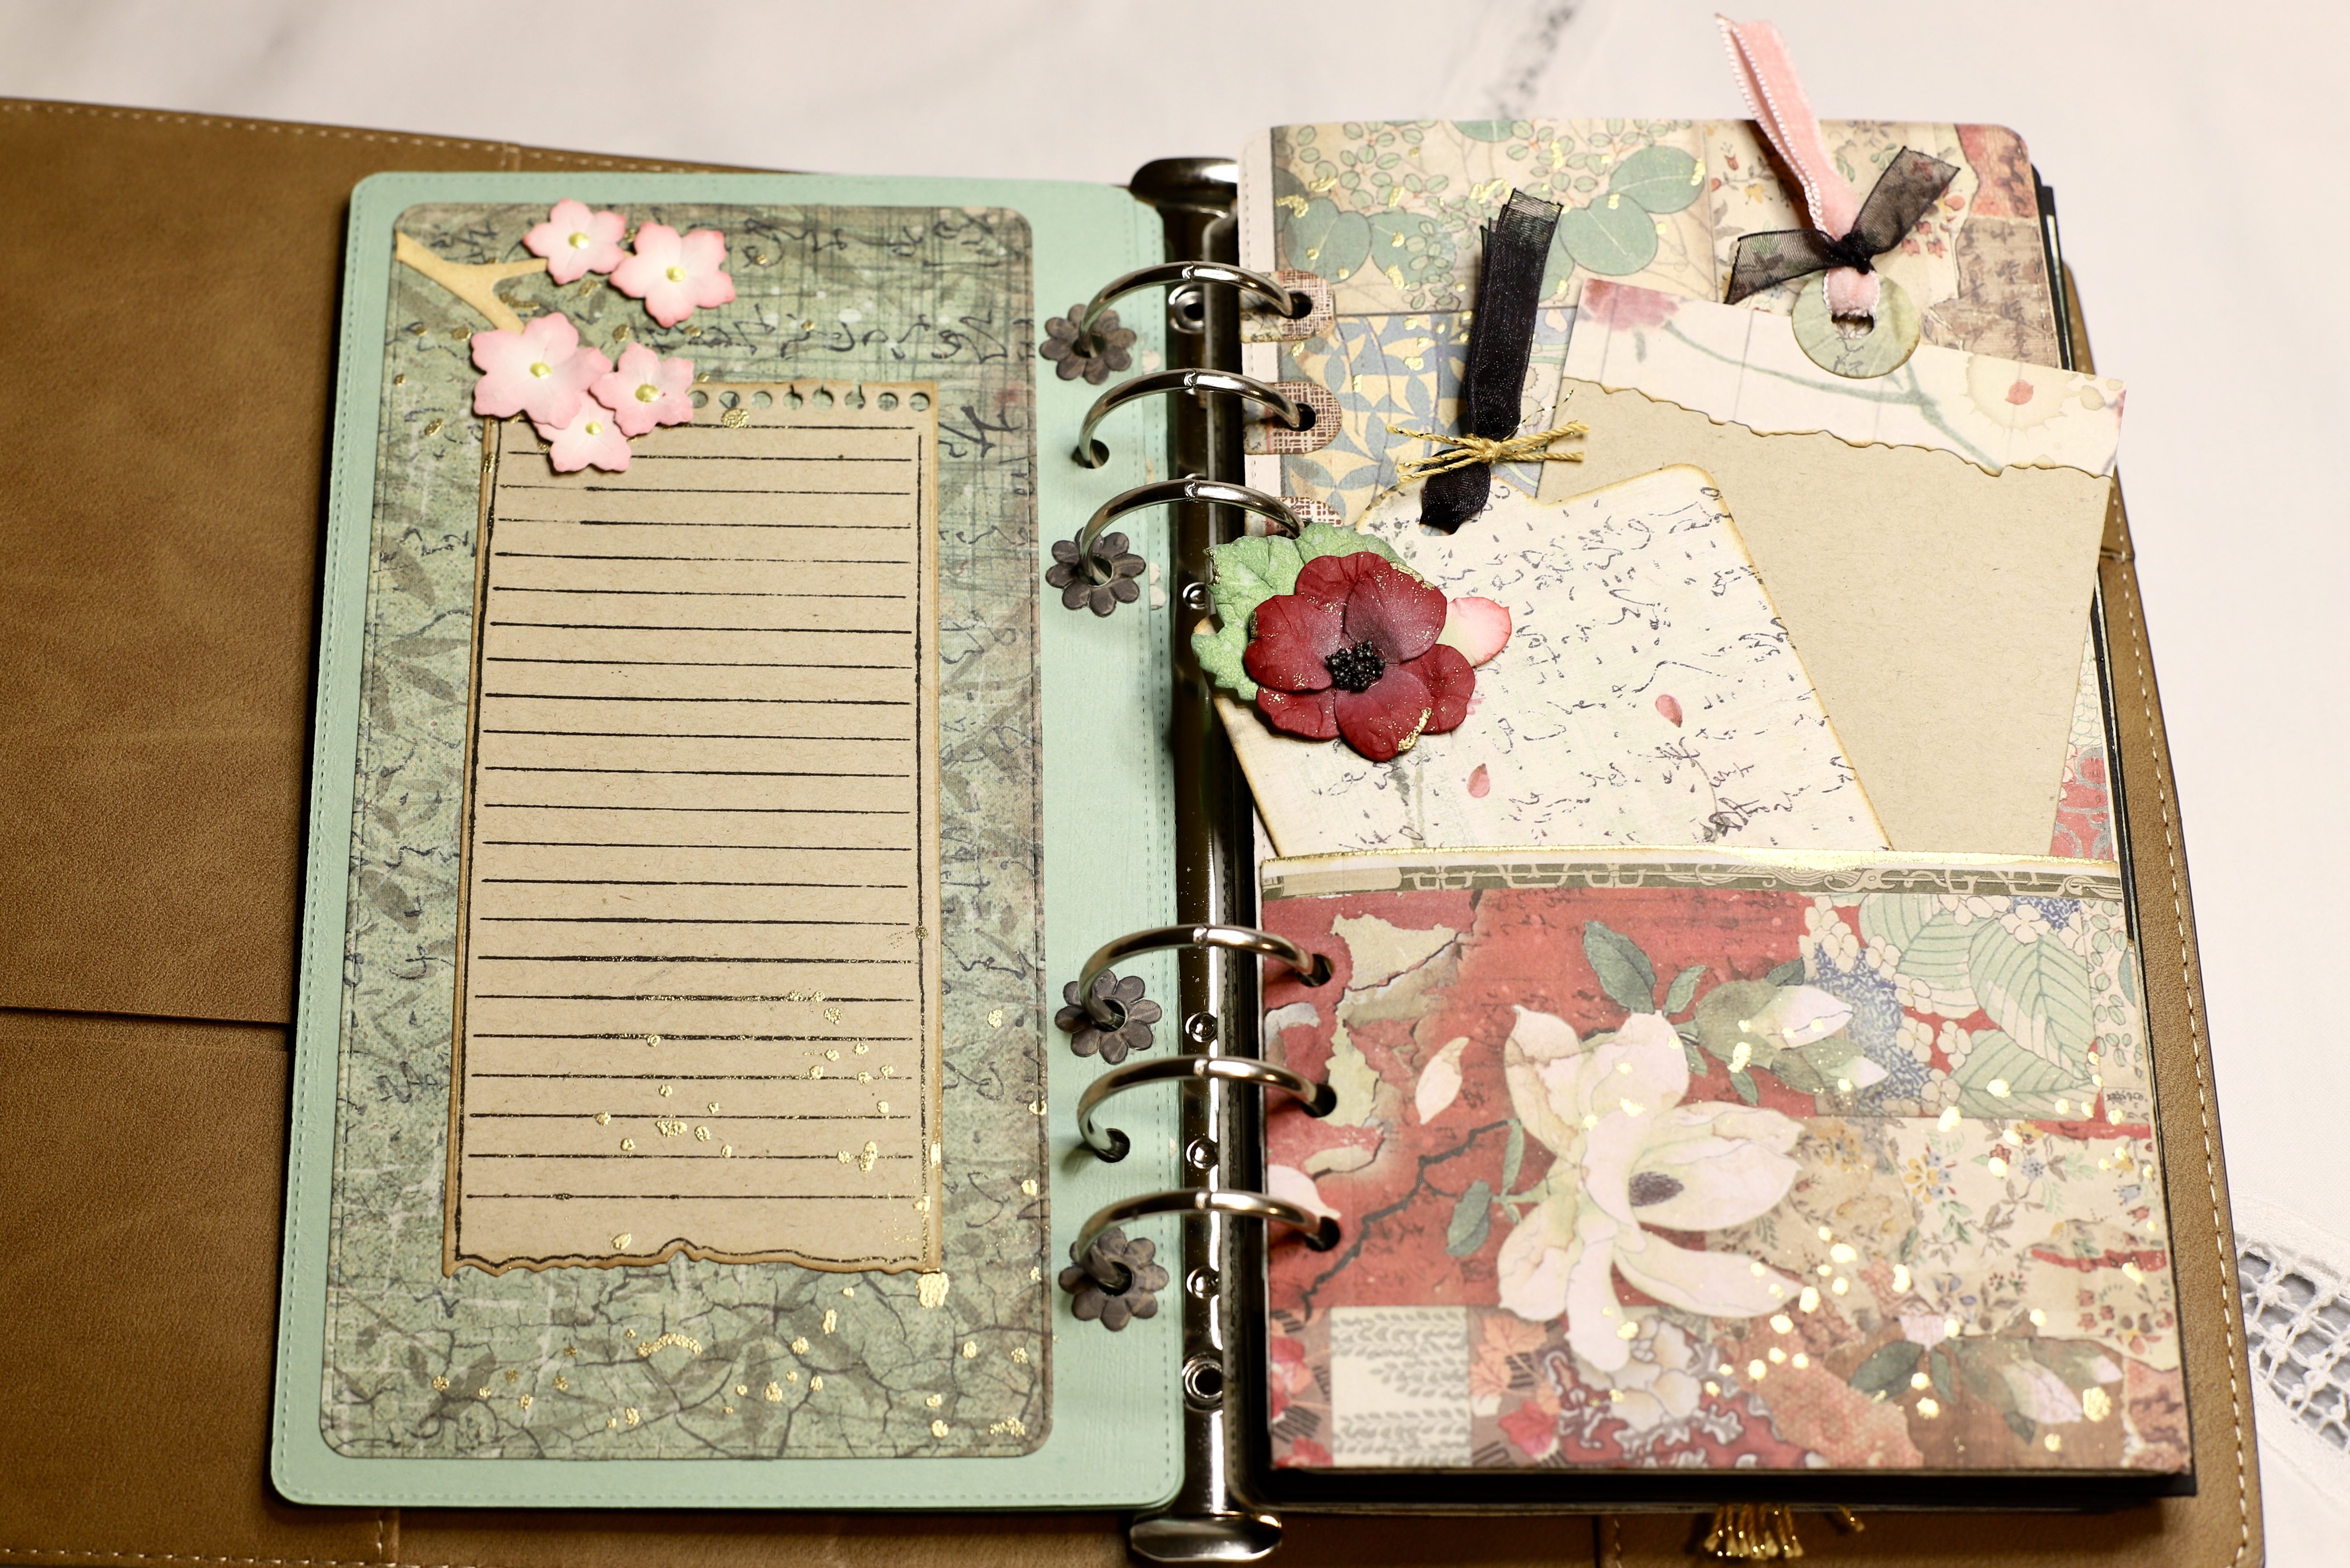
Planner Pocket 1
Planner Pocket 2
Planner Pocket 2
I added pockets to several pages and created tags adding embellishments of shaped flowers, ribbon, and gold embossed accents. Besides adding interest, it seems like heat embossing would strengthen the edge of the pockets.
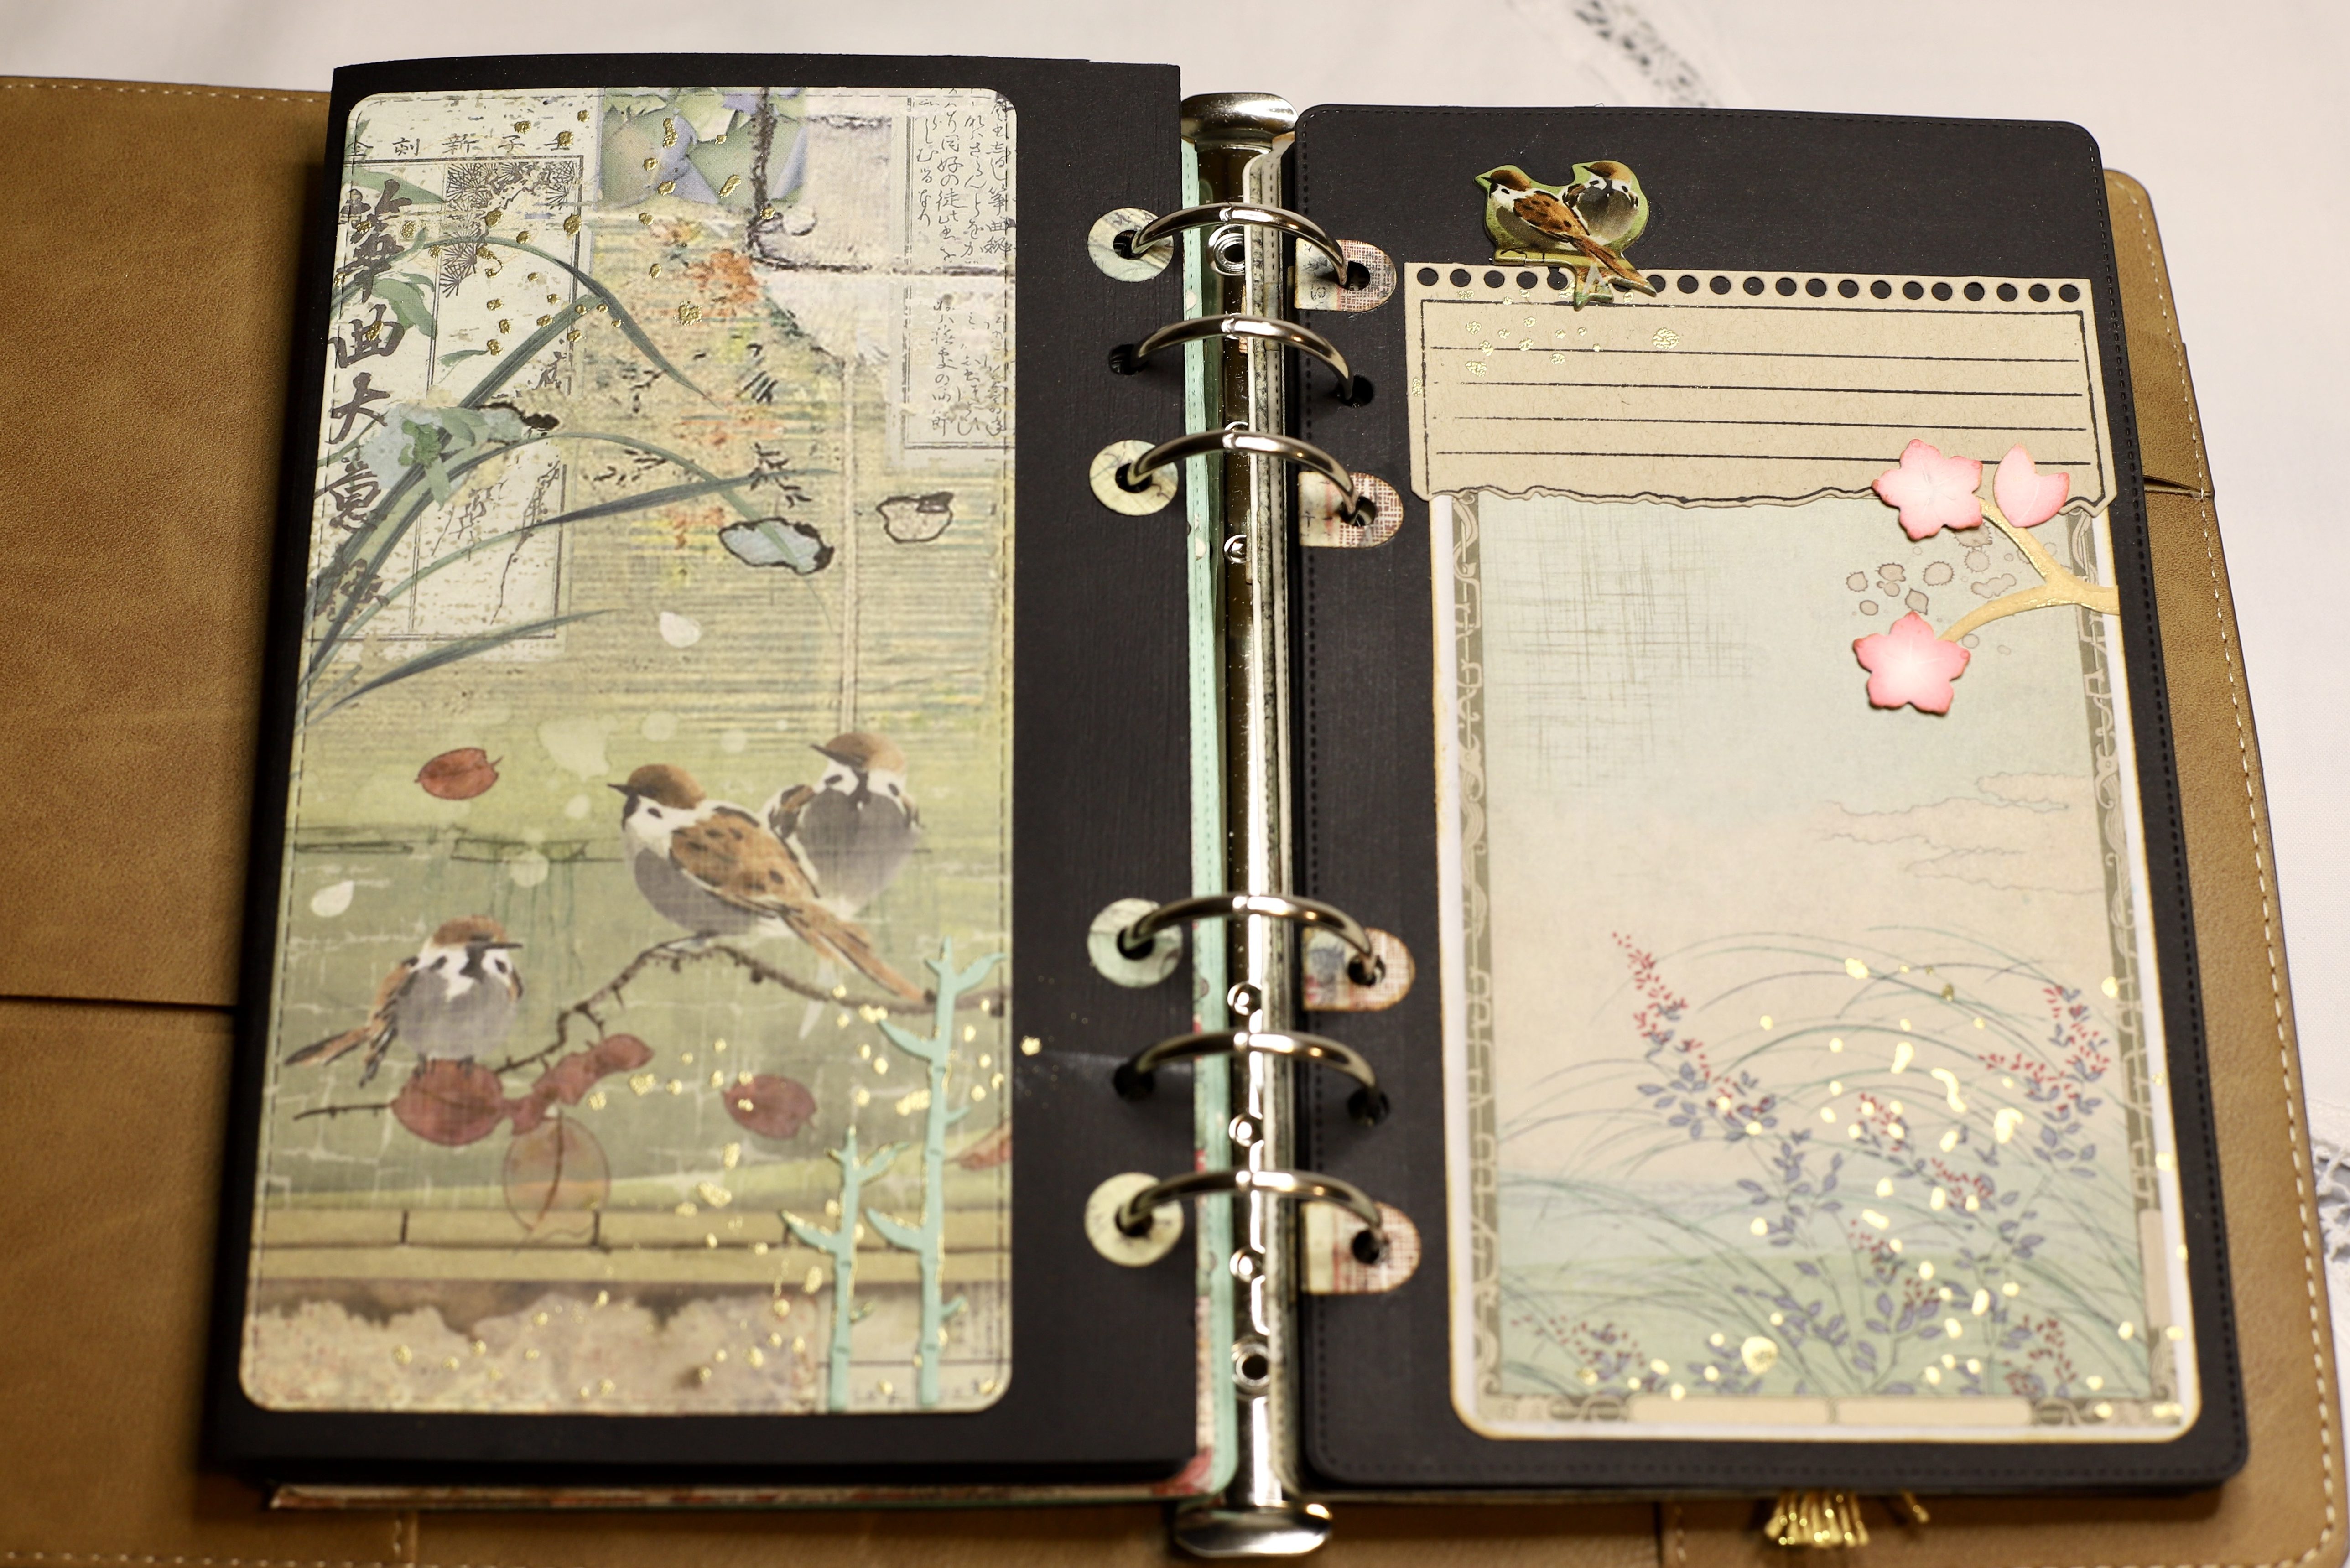
Other embellishments include die cut ginkgo leaves, bamboo, butterflies, and lanterns. I also added die cuts from the coordinating Stamperia pack of die cut chipboard. The quotes are from the Stamperia paper.
The double-wide page on the right was made by trimming black card stock to 8.25 inches (page height) by 8.75 inches and folding it over 4 inches. Create the ring binder holes using Planner Essentials 5 ring binder hole die or using a hole punch.
I created two peek-a-boo flaps using a die from the Rounded Corners set. Photos or journaling can be added under the hinged flaps.
Thank you so much for stopping by. I hope this has inspired you. Please leave a comment or a question.
Happy crafting! Di
Products used:
Elizabeth Craft Designs #1867 Planner Essentials 41, Rounded Corners Page
Elizabeth Craft Designs #1864 Planner Essentials 38, Splatter Page
Elizabeth Craft Designs #1607 Planner Essentials 5
Elizabeth Craft Designs #1608 Planner Pocket 1
Elizabeth Craft Designs #1609 Planner Pocket 2
Elizabeth Craft Designs #1776 Florals 4
Elizabeth Craft Designs #1779 Ginko
Elizabeth Craft Designs #1732 Cherry Blossom Branch
Elizabeth Craft Designs #1774 Florals 2
Elizabeth Craft Designs #1739 Planner Essentials 21 Note Pieces
Elizabeth Craft Designs #1782 Butterfly Pocket Insert
Elizabeth Craft Designs #1736 Reinforcement Variety Pack
Elizabeth Craft Designs #CS253 Note Pieces (stamps)
Spellbinders #S4-979 Lanterns
Spellbinders #IN-043 Dancing Lanters
Spellbinders IN-045 Scruffy Panda (used bamboo die)
Stamperia Oriental Garden paper pack 12×12″
Stamperia Oriental Garden paper pack 6×6″
Elizabeth Craft Designs Soft Finish 90 LB card stock
Stampin’ Up mint green paper
Neenah desert storm paper
Black paper
Elizabeth Craft Designs Clear Double Sided Adhesive 10mm #507
Masking and watercolors were used to create these love inspired cards.
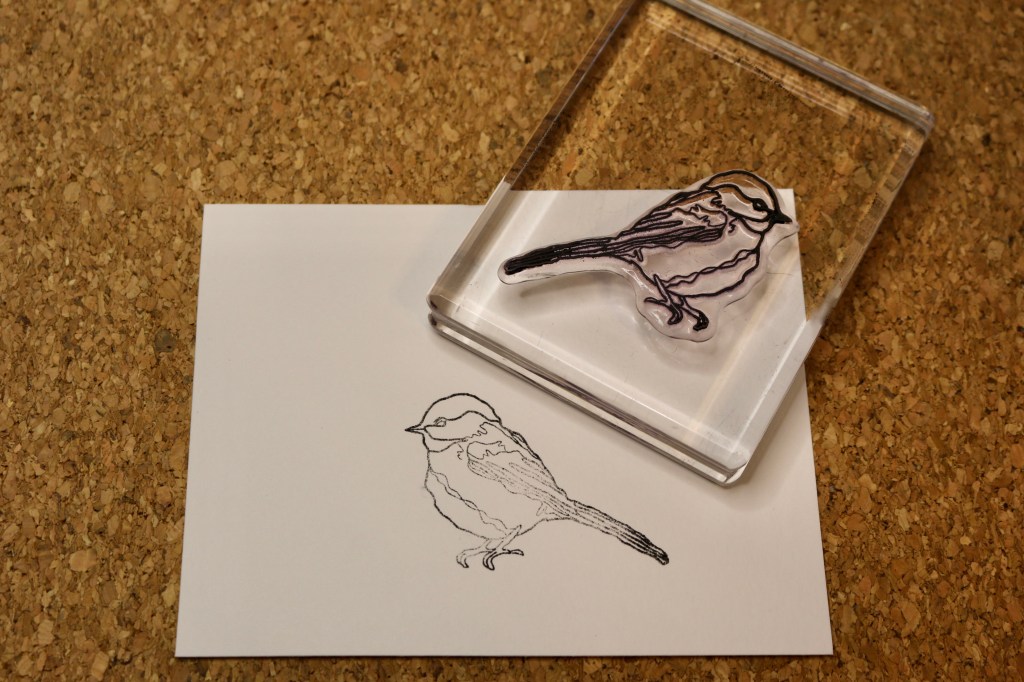
Hello and welcome! I love playing with stamps and seeing what I can come up with by combining them. Both of these cards were made using single bird stamps and the masking* technique to unite them into a scene.
*Masking is using something, like paper, to cover and protect one image so that another image can be stamped over it. This makes the first image look as if it’s in the front.
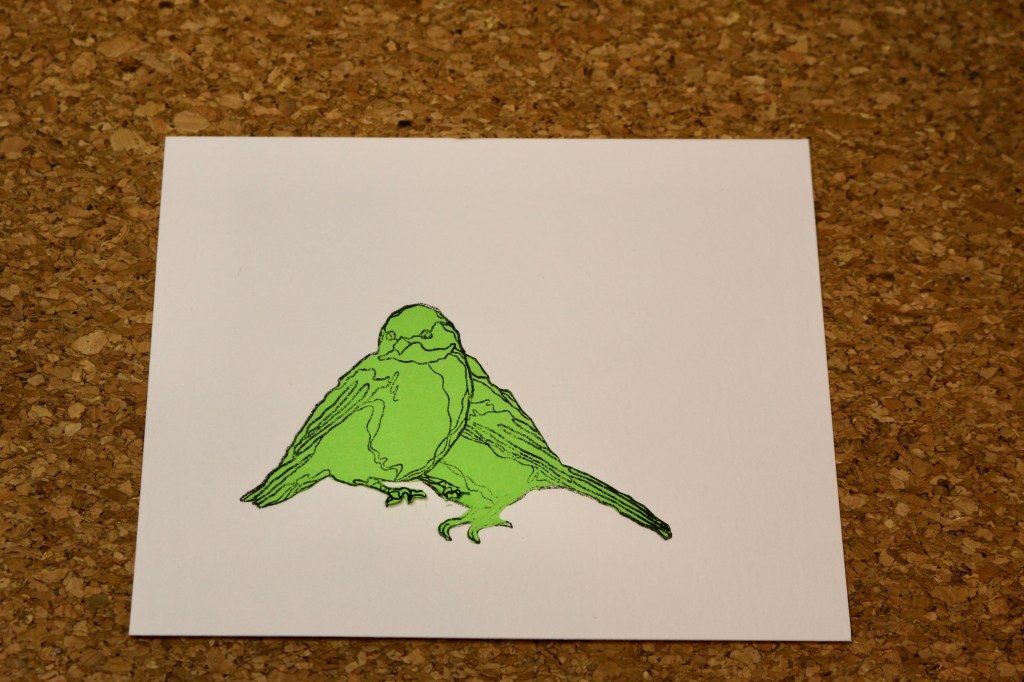
Using the Elizabeth Craft Designs Forever stamp set (#1885), stamp the front bird image with Gina K Amalgam Ink onto watercolor paper.
Stamp the same bird image onto masking paper or a post it note and trim very closely to the outline.
Place your mask on the watercolor paper directly over the stamped image.
Stamp the second bird image over the masked bird (this isn’t shown). Stamp and cut a mask of this bird, too. Place the mask over the new bird as pictured.
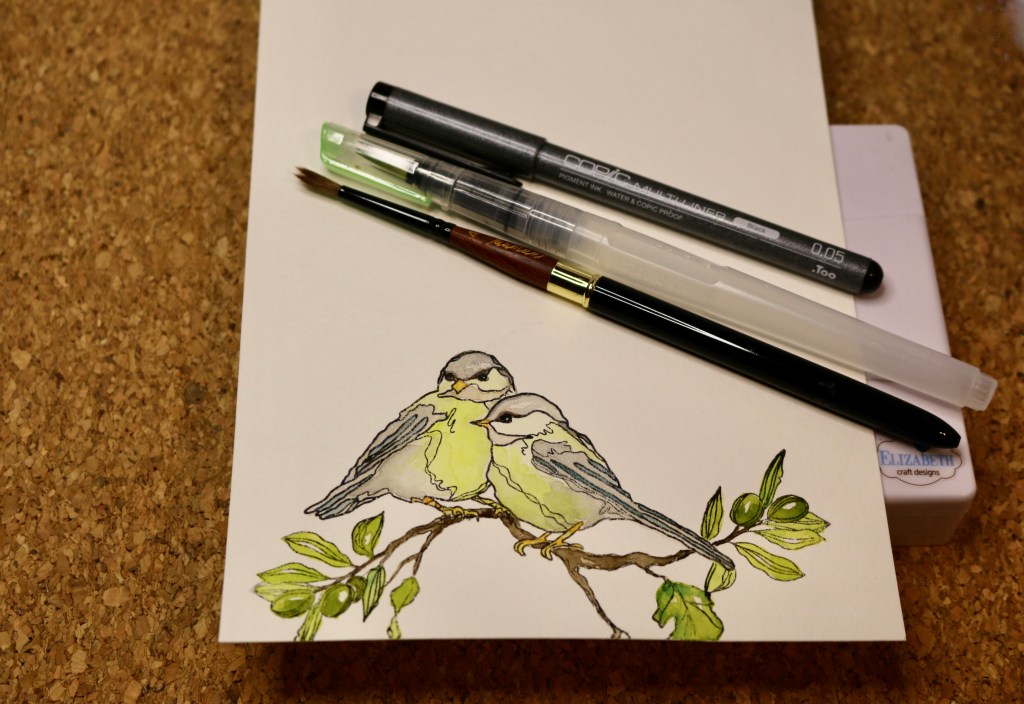
I didn’t take a picture, but mask over stamped areas that you want to protect, then stamp in the foliage. You can even place small amounts of mask, like I did here on the tail, to protect little areas. With a pencil, faintly draw in branches for the birds feet to rest on or to connect to the foliage. Then go over the pencil with a very thin Copic liner or another water resistant marker.
I used watercolors from Elizabeth Craft Designs to paint my stamped images, leaves, and the branch that I drew. Leave some small unpainted areas for highlights. Remember to let an area dry before painting any area that touches it or the colors will run together.
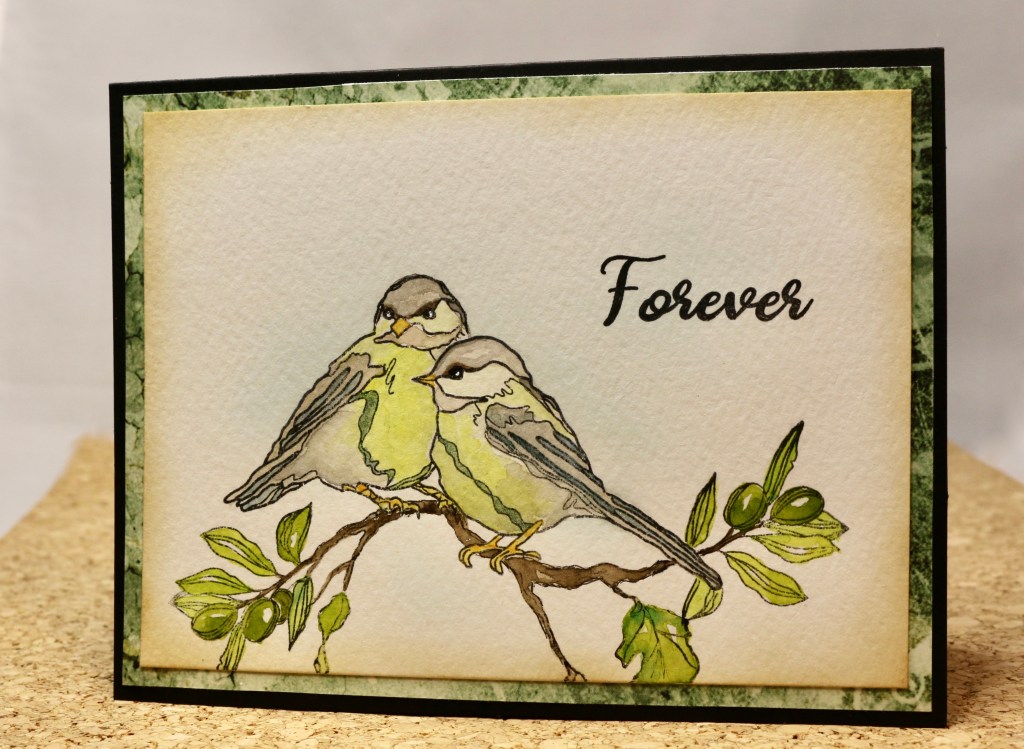
Create a subtle frame by applying brown distress ink along the edges of the paper. Stamp on a sentiment and back with patterned paper from Reminiscence the book 2. Attach to your card base and be sure to share it with someone!
Here is the second card using the same masking technique, but with some gold paint spattered over it.
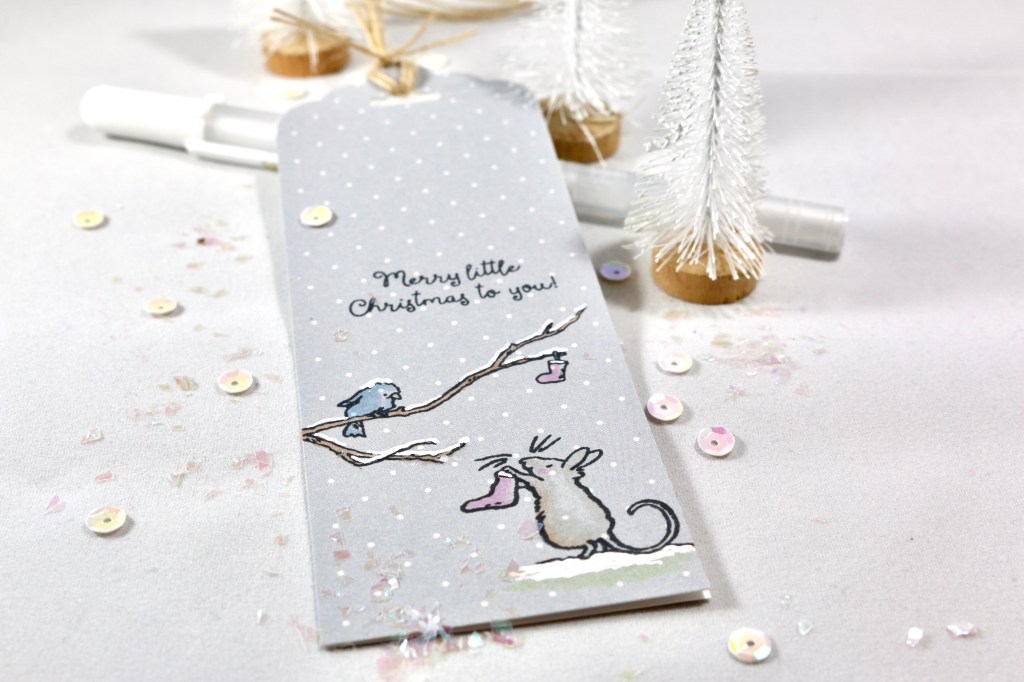
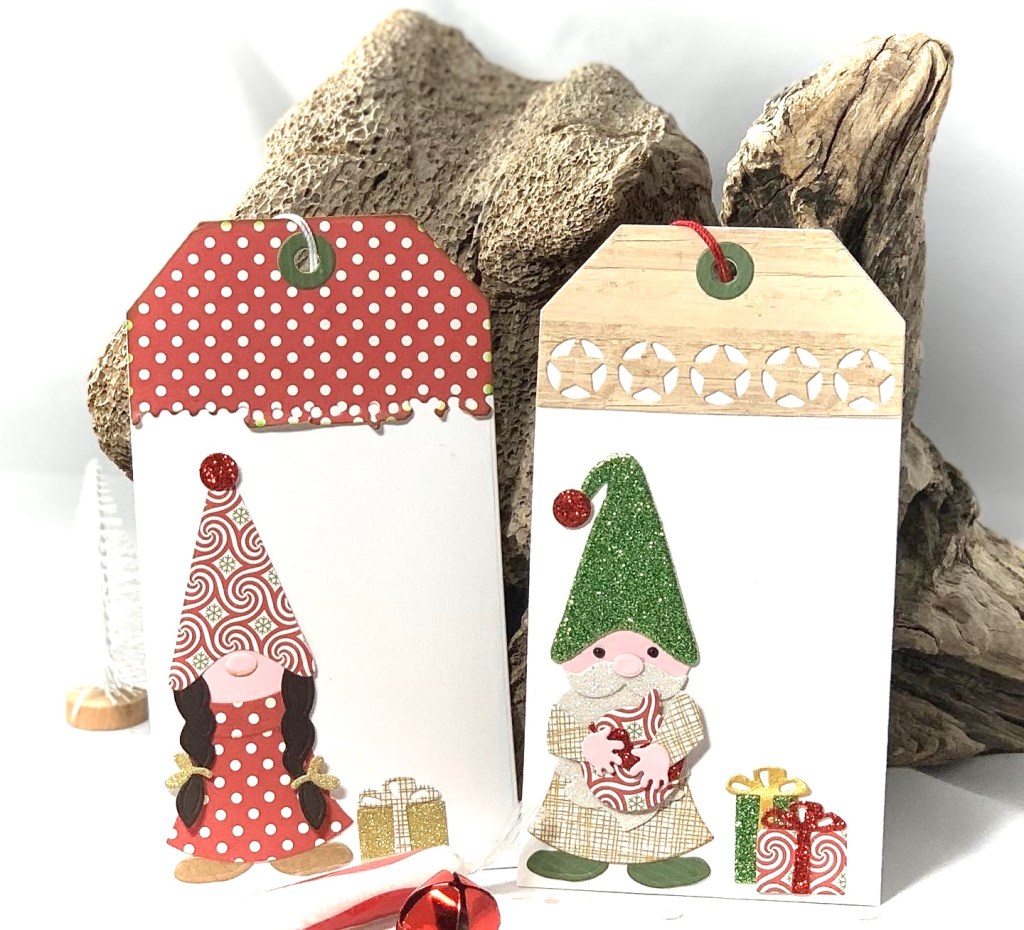
Hi and Happy Holidays! These are just a sample of the many tags that I made for the holidays. It’s so fun to create whimsical glittery gnomes or colorful little animals for tags to make the gift wrap extra special.
Colorado Craft Company’s stamps by Anita Jeram made this tag super quick to make. The tag was cut from Waffle Flower Half Dot patterned paper, stamped, then colored with light Copic marker colors. Snow was added with a gel pen.
Lawn Fawn patterned paper, twine, and a few stamped images colored with Copic markers made this tag pop.
Elizabeth Craft Designs Planner Essential 26 Tags & Toppers Dies and Joset’s Gnome dies add whimsy and layers to these sparkly tags.