Using the Everyday Elements collection

Hi. Di here with a decorative Valentine’s box that can be used for candy, a small gift, or love notes. I’ve embellished with a soft pink and green color palette and a pair of love birds. Let’s get started.
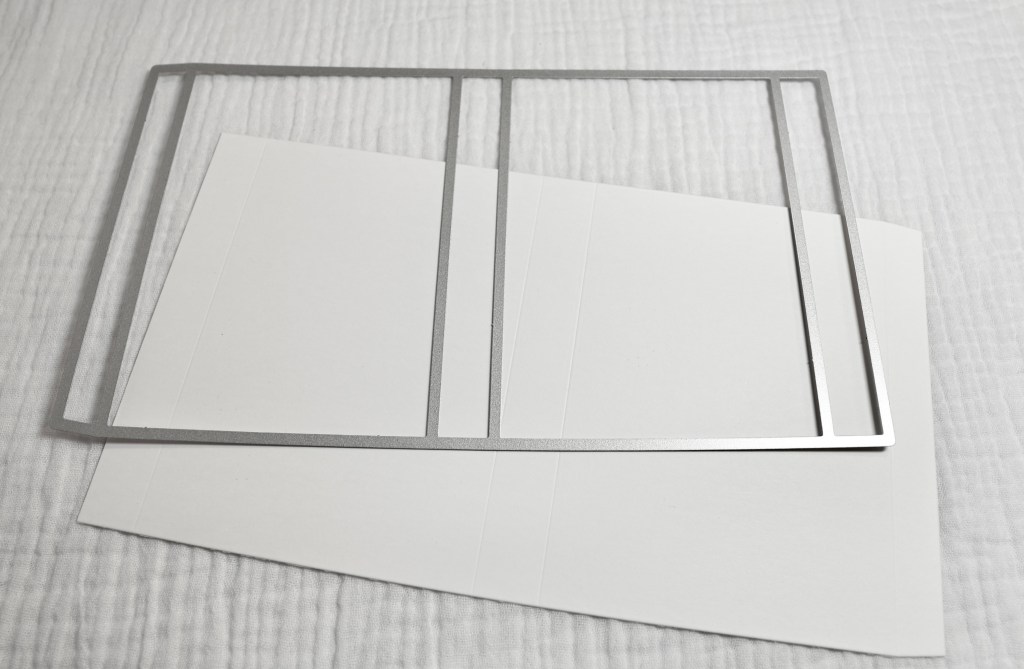
Step one: Using the Elegant Decorative Box #2123 from Elizabeth Craft Designs, cut one box base from heavy white cardstock. I used 110# cardstock.

Step Two: Use the oval die from Elegant Decorative Box #2123 to cut a hole from the top of the box base.

Step Three: Cut a box from Harmonious Hodgepodge paper #C024 using the Elegant Decorative Box. Use the decorative oval die (from the same die set) to cut out an oval from what will be the box top.

Step Four: Cut the patterned box apart: cut apart on both sides of the scored lines. This creates decorative matts for the top, bottom, and sides of the box. Optional: Blend light pink ink around the edges.
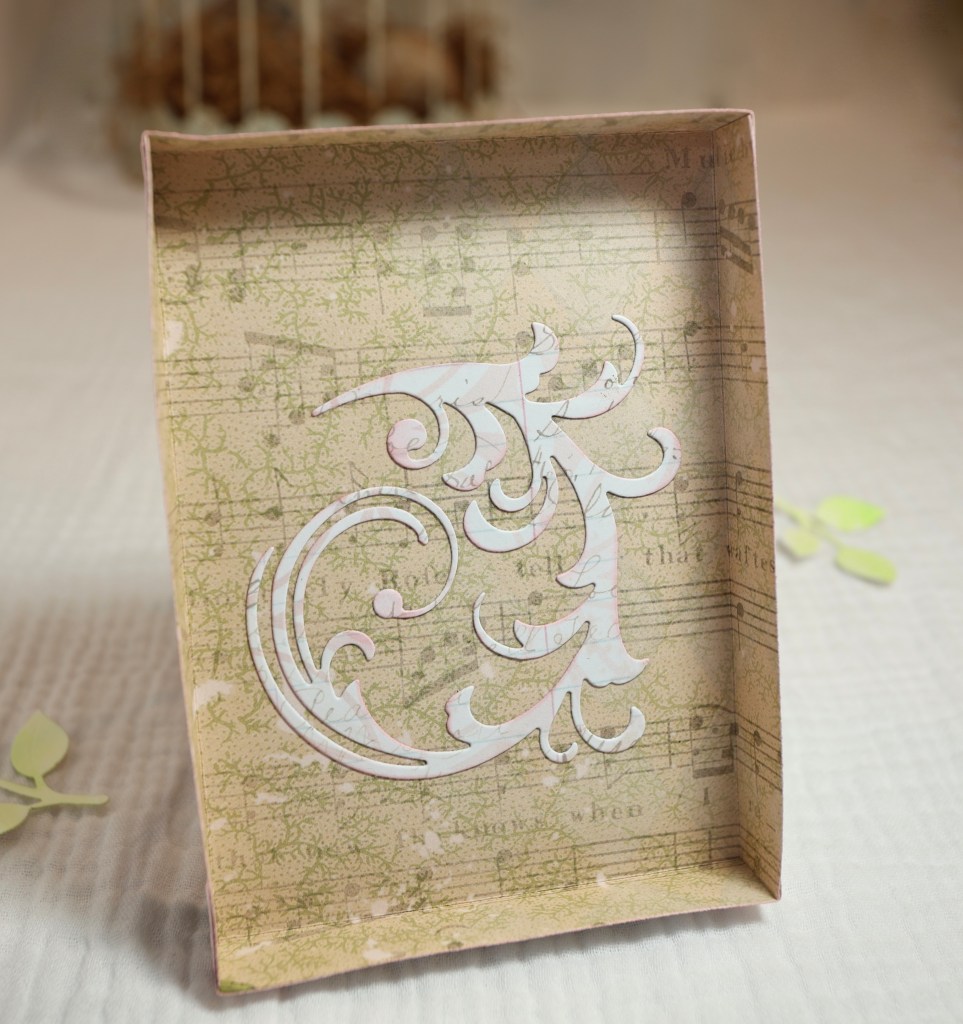
Step Five: Cut a piece of acetate 3 ⅜ inch by 4 ¾ inches. Adhere the acetate to the back of the patterned matt covering the hole. (It will be between the white box and the decorative paper.) Attach the matts to the white box with tape or glue.

Step Six: Use Happy Banners #2200 to cut a white heart banner. Also cut pink hearts with the coordinating heart die. Glue the pink hearts onto the banner.
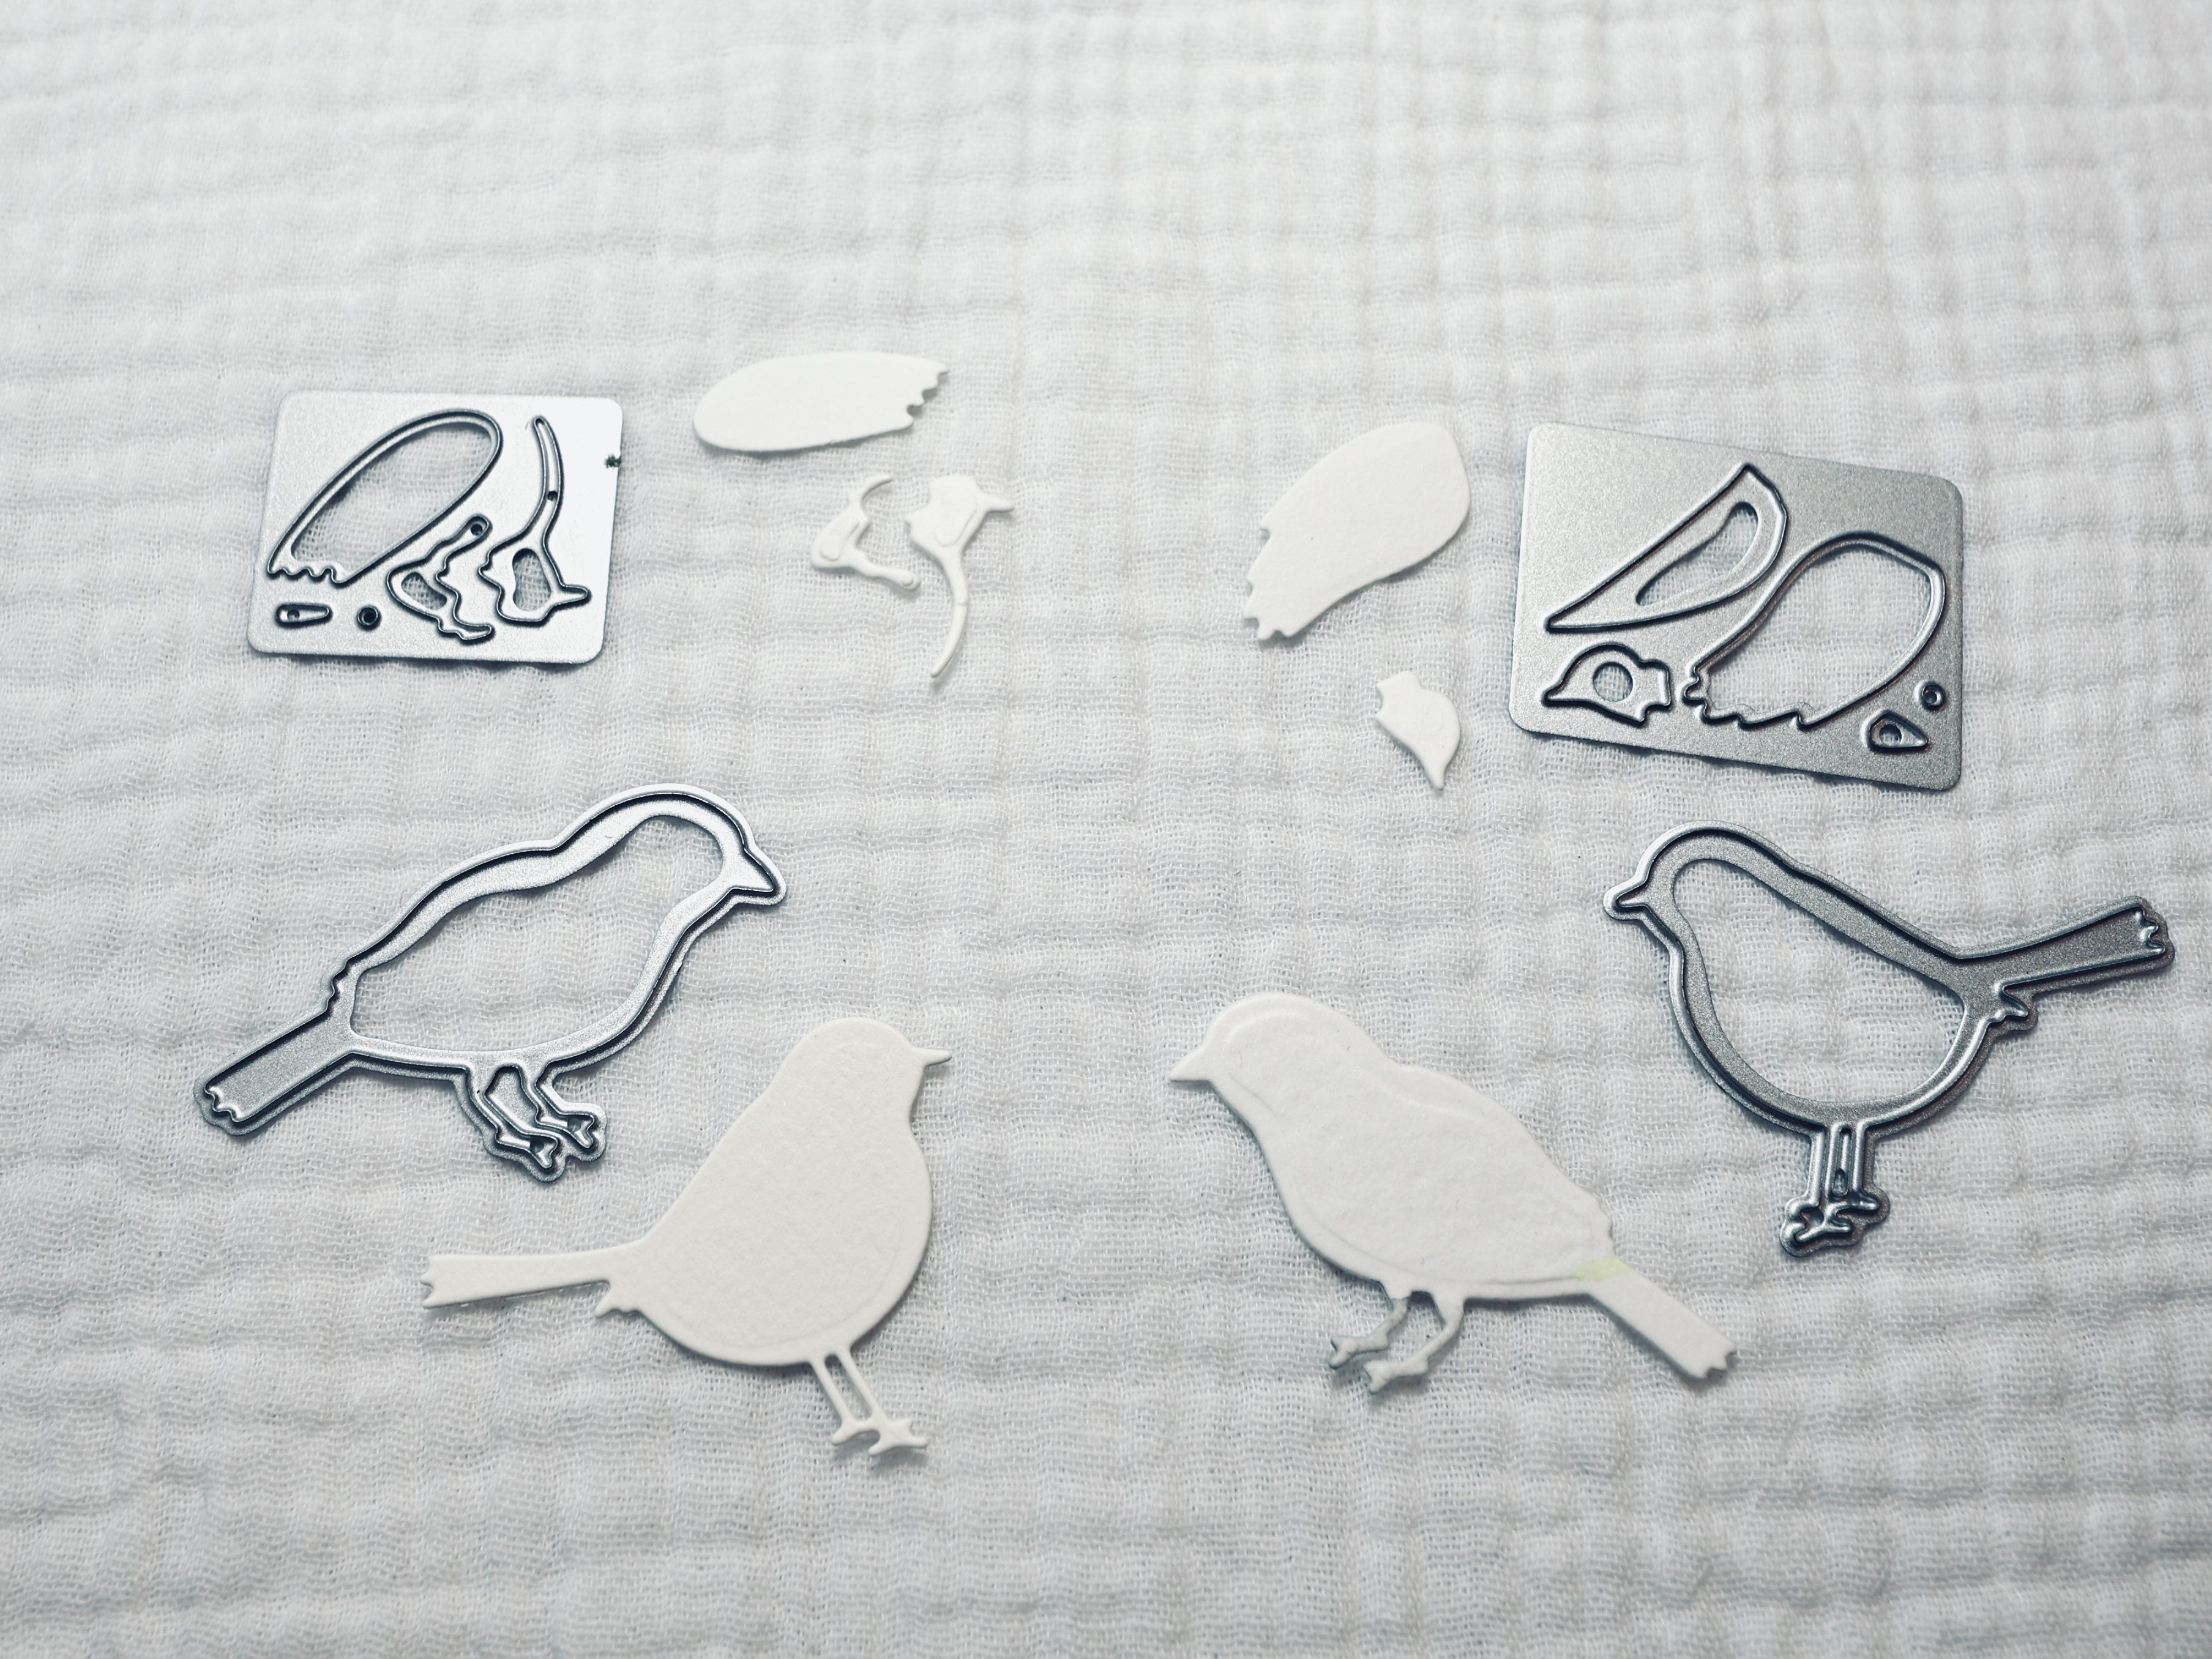
Step Seven: Using watercolor paper, cut one left facing and one right facing bird from Birds & Dwellings #2197. Also cut the wings and eyes. Watercolor the bird parts in light pink and green and gray for the eyes.
Assemble the birds when dry.

Step Eight: Using light pink cardstock, cut the two smallest flower dies from Florals 28 #2117 and two pink hearts from Birds & Dwellings.
Each of the dies cuts four flowers. Shape the four smallest flowers into buds. Shape the larger flowers, but leave them open. Glue one flower bud onto the center of each open flower. Blend pink ink around the edges.
Step Nine: Cut two of the smaller leaf clusters Florals 28 (above) from watercolor paper. Color the leaf clusters with light green watercolor and shape slightly.

Step Ten: Attach double sided adhesive to Harmonious Hodgepodge paper. Using Everyday Words 3, cut Happy Valentine’s Day. Cut the shadows from white cardstock and attach the words.
-Glue the ends of the banner onto either side of the center of the box opening. Clip off any banner that hangs over the sides.
-Use tape (glue may not stick to the acetate well) to attach the birds.
Step Ten: Cut the inner box/tray from Harmonious Hodgepodge paper. Fold along the score lines and adhere the tabs to form the inner box.
Options: Cut a Fancy Flourish #2021 from Harmonious Hodgepodge paper and adhere it to the bottom of the box tray and add pink beaded Borders & Trims along the outer corners.
Step Eleven: Embellish your box with the beautiful pieces that your created.

Are you still with me? Now you can add something inside the box or enjoy it as is. I’m so happy with the soft color palette and I love birds, of course!
Happy Valentine’s Day!
Di aka a little bird crafts
Would you like 10% off your purchase of Elizabeth Craft Designs products? If so, use my link here https://ecraftdesigns.com/ALITTLEBIRD28 or below. I will also earn a small commission at no additional cost to you. I’ve listed US and European links. Thank you.
- Product List:
- Harmonious Hodgepodge paper #C024 https://collabs.shop/ro766x https://collabs.shop/2d3hzd
- Elegant Decorative Box #2123 https://collabs.shop/cuayjs https://collabs.shop/dtt5yz
- Birds & Dwellings #2197 https://collabs.shop/ydt9nj https://collabs.shop/dtt5yz
- Happy Banners #2200 https://collabs.shop/xonldy https://collabs.shop/1w4iof
- Everyday Words 3 #2141 https://collabs.shop/l3q9xa https://collabs.shop/fwnjpm
- Borders & Trims 2134 https://collabs.shop/fwnjpm
- Florals 28 #2117 https://collabs.shop/coajq3 https://collabs.shop/oj3kcc
- Fancy Flourishes #2021 https://collabs.shop/kvojmi https://collabs.shop/8jgdsy
- Fine Point Tweezer #817 https://collabs.shop/sn45ce https://collabs.shop/gzxino
- Clear acetate
- Water colors
- Light pink ink
- Prills (optional)

Beautiful!
LikeLike